Backing vocal tracking

For todays session we focused on tracking all of the backing vocals for the project. This was also the last recording session of the project before the moving onto the mix prep and mix stage.

Due to the availability of the multi track studio and a fault in studio 3, I was unable to get into either studio for this session which posed as a potential problem. However, I was fortunate enough to know someone how owned a small studio called UPR Records a few miles from where I live where I could record these last parts. I told the owner about the project I was working on and he agreed to let me use the studio for a few hours.

Working in UPR allowed me access to some different hardware as well as some different microphones. The studio was equipped with a Behringer X32 digital mixing desk which allowed the use of numerous forms of processing before sending the audio into Pro Tools. The studio also had a Rode condenser mic which I found to be a little thinner sounding compared to the AGK C414 i’ve previously been using.

In terms on processing, I applied a lot of similar techniques I used back in my lead vocal tracking session. I used the built in HPF to remove everything below about 60hz and the built in compressor to reduce the dynamic ever so slightly. It’s important to note that i didn’t go too excessive with the EQ and compression here mainly because I wasn’t use to the room, the sound of the hardware I was using and the monitors I was listening through. Being subtle with the processing also meant that I could take it home and process it further on speakers that i’m more comfortable with.

IMG_6573


Lead vocal recording

Today the main objective of the session was to record all of Daves lead vocal parts whilst making sure that i touched on learning outcome 1 and learning outcome 3.

From my research, a common technique applied by a lot of the big producers is to use a valve condenser microphone running into an independent (sometimes also valve) hardware pre-amp, through an external compressor and then into Pro Tools. For example, Jacquire King likes to use his own Sony C37A through a Neve 1073 or a 1081 and then run it through an LA-2A compressor. Jim Abbiss on the other used a Neumann M149 valve microphone on the Arctic Monkeys debut album which he then ran through a UA 1176 compressor. I used this research to inform my own decisions at the beginning phase of vocal production.

Unfortunately the uni don’t have any valve microphones so instead I opted for the AKG C414 due to its flat EQ response. I used the pre-amps on the Audient desk and then ran the signal through the Drawmer  DL241. When applying the Drawmer into my signal path, it was clear that its main use was going to be catching some of the harsh transients coming from Daves voice and before relying too heavily on the Drawmer, I asked Dave if he would be able to pull back from the mic a little bit when singing at a louder volume. However when he tried this I felt like the vocal performances were not a lively and I decided to apply harder compression on the Drawmer to combat this.

Once setting the threshold and the ratio, I altered the attack and release time to try and catch some of the transients, with this technique being inspired by Jimmy Douglass. Doing this helped to reduce these transients significantly however there were still a few transients that were slipping through and I think this mainly down to the compressor not a having a short enough attack time. I could’ve combatted this by adjusting the ratio and threshold eve further however I decided not to so that I didn’t run the risk and of over compressing and squashing the signal.

Once I was happy with the signal going into Pro Tools I recorded a few takes of each track so that it gave me more options during the editing and comping stage.

FullSizeRender

Jim Abbiss https://www.soundonsound.com/people/jim-abbiss

Jacquire King, Lowell Reynolds & James Bay: Recording Chaos And The Calm https://www.soundonsound.com/people/jacquire-king-lowell-reynolds-james-bay-recording-chaos-and-calm

Mixing Justin Timberlake Vocals – Jimmy Douglas https://youtu.be/PpIanhvC9qw


Bass tracking

Today I worked with Dave on tracking all of the bass parts for this project.

Prior to this session I conducted some research on different bass production techniques used by various producers and if there were any specific types of equipment or hardware that were popular for this. Although I found a vast array of different techniques, I found that a lot of producers favoured the use of the DBX 160 compressor for bass to help reduce its dynamic range including Jacquire King, Joe Chiccarelli and even Mark Ronson who uses the Waves plugin equivalent. I also used a technique applied by Warren Huart where he adjusts the attack of the compressor to print a bass track into Pro Tools which stops the bass from ‘fish tailing’.

When applying these techniques into my own session, I used the pair of Sony SRP-L210’s to compress the bass amp and the bass amp DI. A quick point here is that I decided to leave the bass guitar DI channel raw and uncompressed so that I could use it as a backup if I needed it further along down the line. I adjusted my gain structure to the appropriate level and then began setting the threshold on the compressors to achieve around 3-5 dbs worth of compression. I did actually have an EBS bass compressor pedal on me for the session however using the hardware in the studio gave more flexibility when it came to adjusting the ratio and the attack.

FullSizeRender copy 2

Applying the necessary amount of compression to these two channels really helped warm up the overall sound of the bass as well as control the dynamic range. The main reason I wanted to reduce the dynamic range like this is because when Dave was recording his bass takes, there was a significant dip in volume when he played the higher strings which prevented us from getting a stable level for the control room mix. Once I was happy with the compressed bass tone, I noticed that the signal was still ‘fish tailing’. To prevent this I increased the attack time on both of the Sony compressors which didn’t eliminate these sharp transients completely but it definitely helped reduce them. The pictures below show the ‘before’ and ‘after’ of the adjusted attack time of the compressors.

Before: Screen Shot 2017-11-13 at 17.46.44

After:

Screen Shot 2017-11-13 at 17.46.26


Jacquire’s Shoot Out: Vintage Hardware vs. Apollo & Unison / UAD Plug-Ins https://youtu.be/D0TrTPAXM1I

In the Studio with Mark Ronson https://www.waves.com/in-the-studio-mark-ronson?utm_source=wnletter&utm_medium=email&utm_content=studio-mark-watch-now&utm_campaign=weekend-newsletter-oct-13-2017-ronson-mR

Recording a Band with Joe Chiccarelli https://www.youtube.com/watch?v=rjFPQFjIEdo

How to Record Bass – Warren Huart: Produce Like A Pro https://youtu.be/9F5XgkvGuSE

Drum tracking

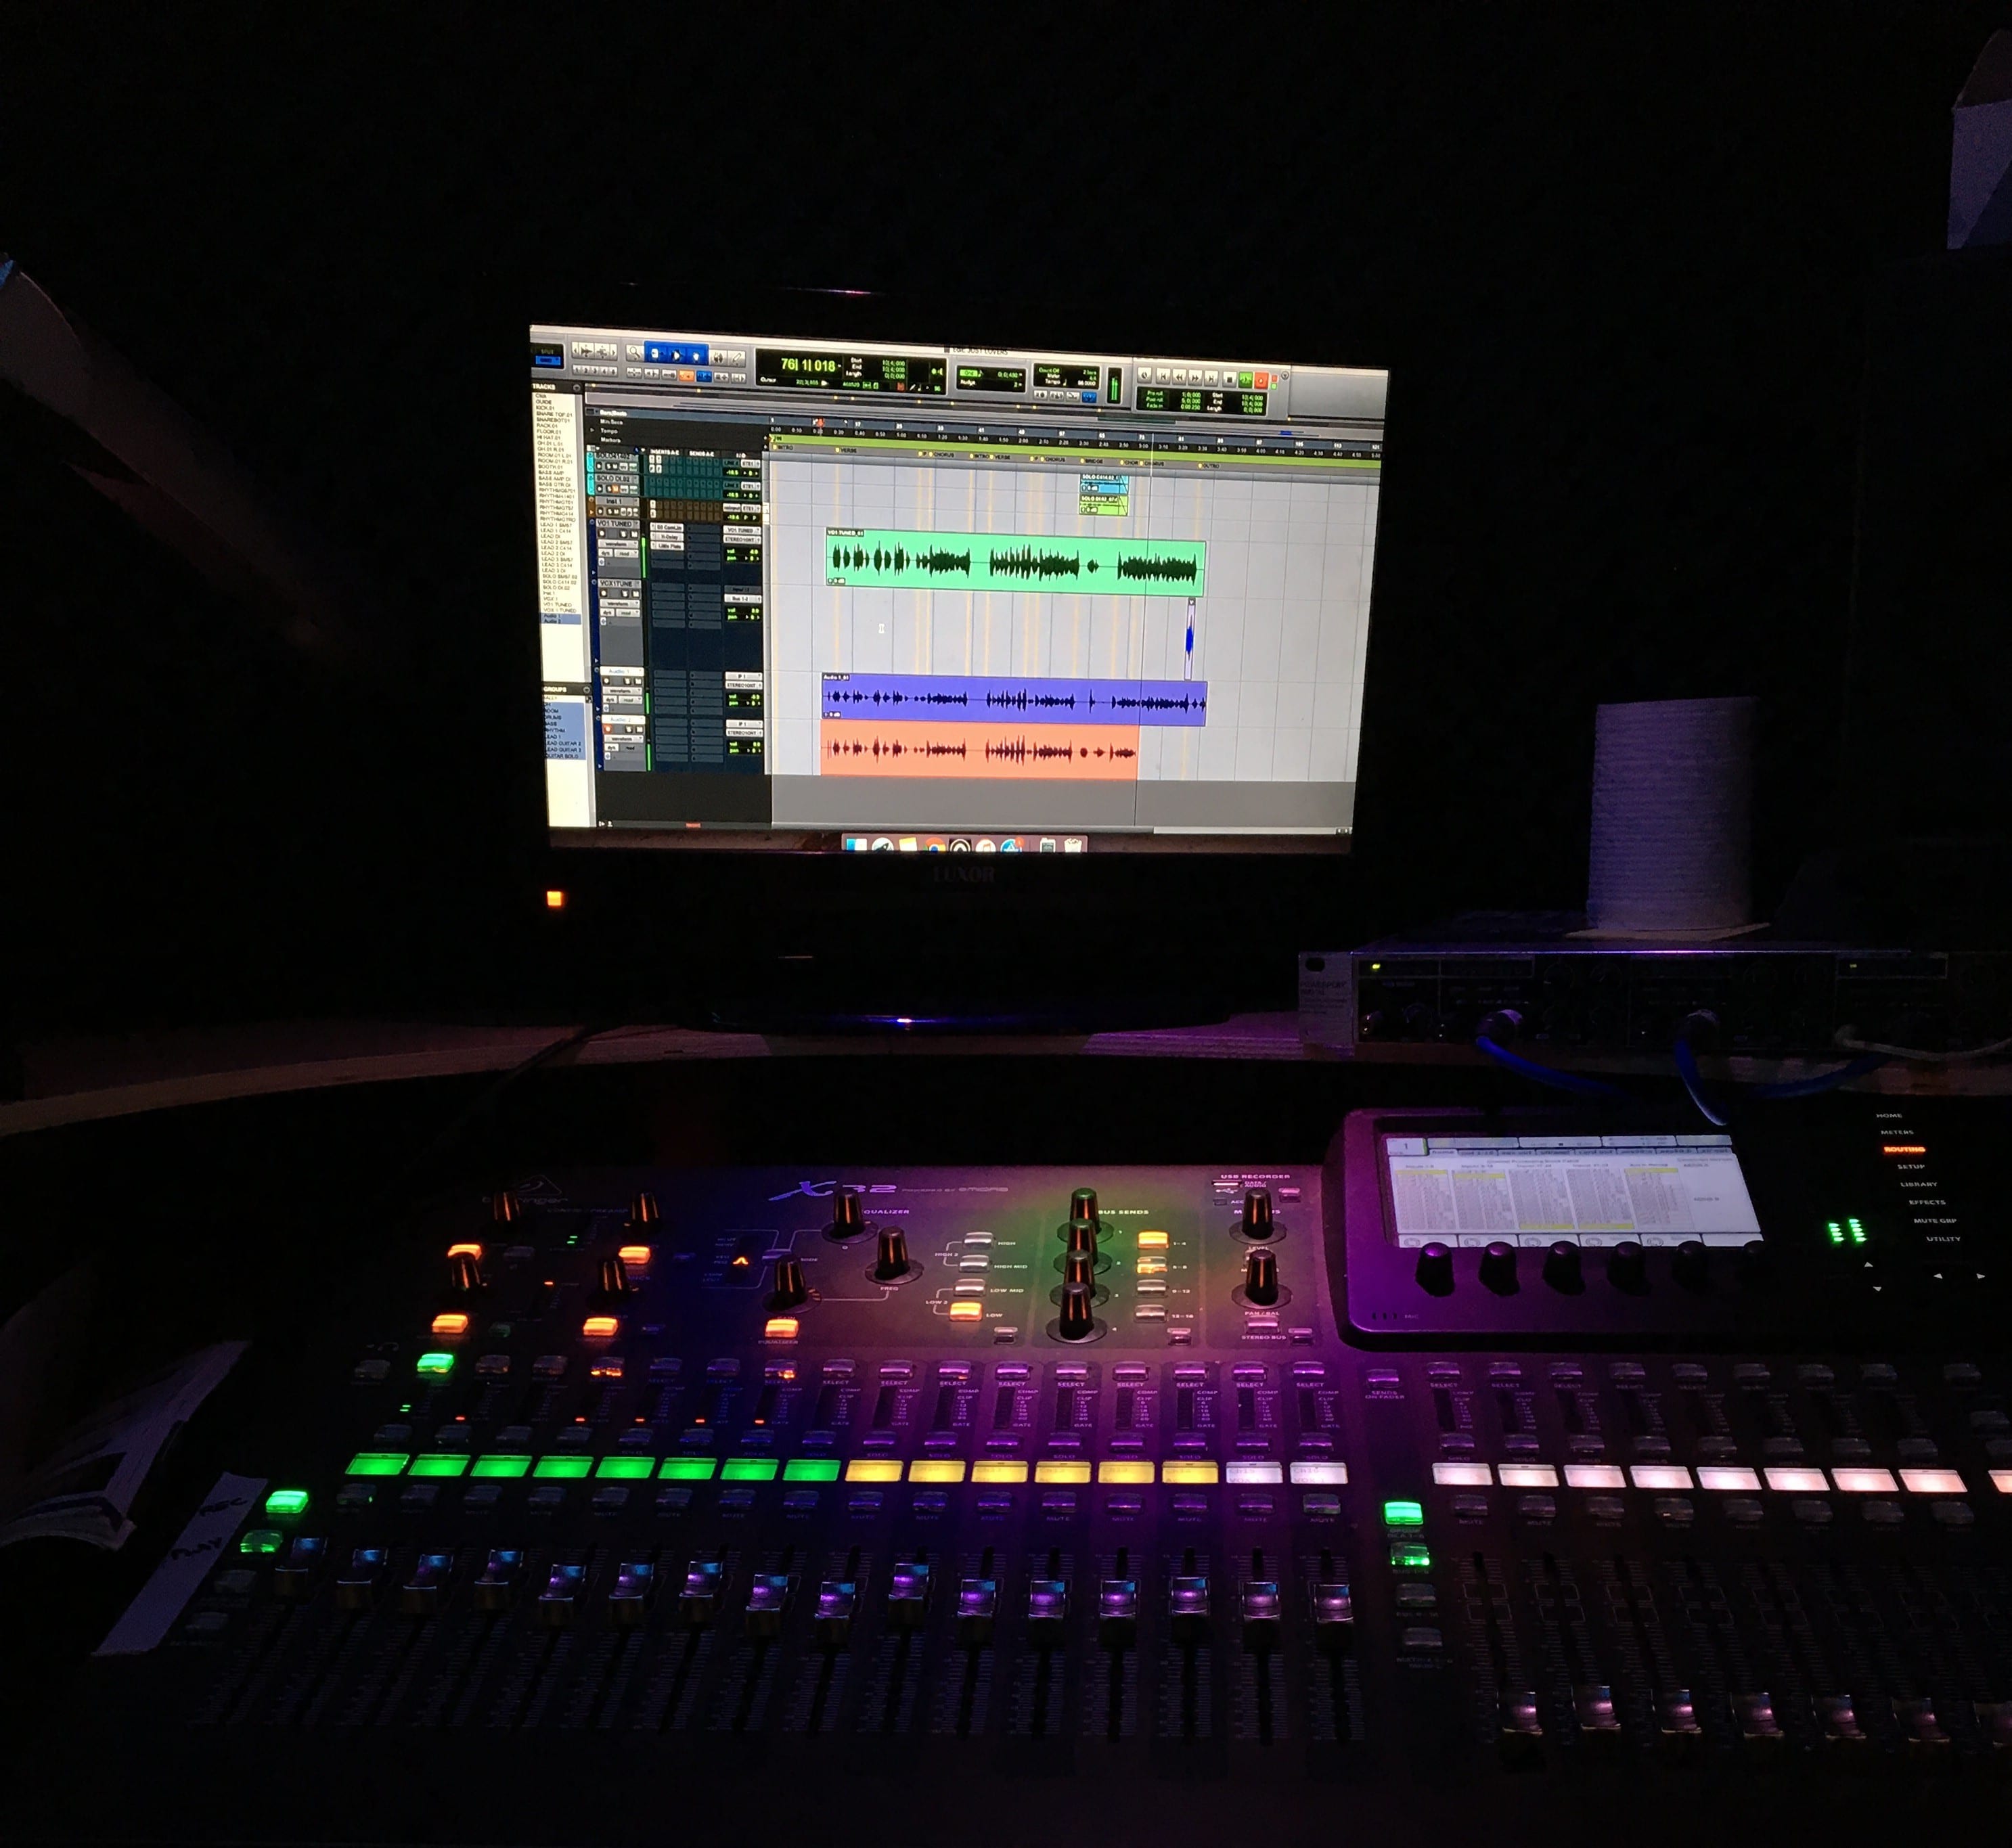
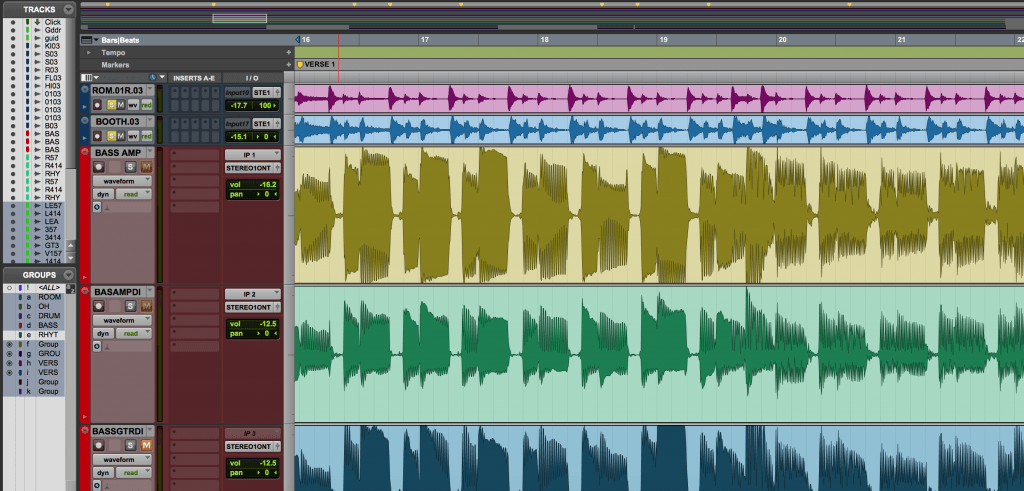
For todays session, our main focus was to track all of the drums for this project. Ensuring that i also covered my first learning outcome, I wanted to make sure that I incorporated the use of some outboard compression and desk EQ when recording into Pro Tools.

Prior to the session, I spoke to Dave about the kind of style he wanted for this project as well as some of his influences. I also asked him to send me some demos so i had a rough understanding of how the songs already sounded and how we could evolve them in the recording sessions. These demos also provided essential reference points for the session drummer and really aided the efficiency of the drum tracking session.

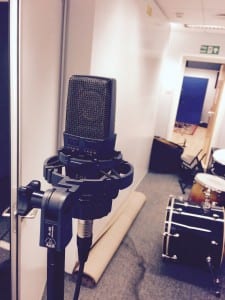
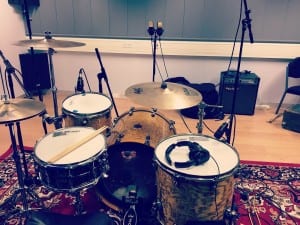
When mic-ing up the drum kit, I really wanted to make sure that I added a room mic down the bottom of the corridor outside of the live room. Due to its reflective nature compared to the live room, this added a nice ambience to the sound of the drums and when compressed, provided a lot of excitement to the overall mix.

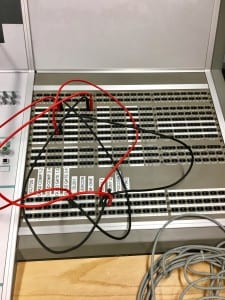
Once I had mic-ed up the drums accordingly, I began to incorporate the use hardware compression and EQ to mould the sound of them. One thing to keep in mind here is that the majority the of choices I made here were subtle for two reasons; there was a lot of low end spill bleeding into the control room from the live room which made it difficult to the perceive some of the frequencies I was hearing. Keeping them subtle would also give me more room to make further dynamic and EQ changes in the mix stage when i’m in an environment where I am able to hear different frequencies more accurately.

FullSizeRender

With the kick drum, I began by sweeping the frequency range to remove some the ‘mud’ and ‘boxy’ sounds within the drum. This is a technique also applied by Joe Chiccarelli but instead he uses an API graphic EQ as oppose to the EQ on the desk. I then used a similar technique for both snare drum mics however this time it was to eliminate some of the ringing and overtones coming from the drum. This is a technique I found on drumlessons.com and have found it very effective in improving the tonal qualities of the snare drum. For the toms, I used reductive EQ on the lower mids but also boosted some of the high end to give the drum more ‘point’ and attack. This technique is also utilised by Victor Guidera at drumlessons.com. Finally, when it came to the using desk EQ for the overheads, I applied a HPF to both of the mics at the input gain stage and then applied a slight boost to the high shelf at around 12khz to give the overheads a little more air.

IMG_6429 2

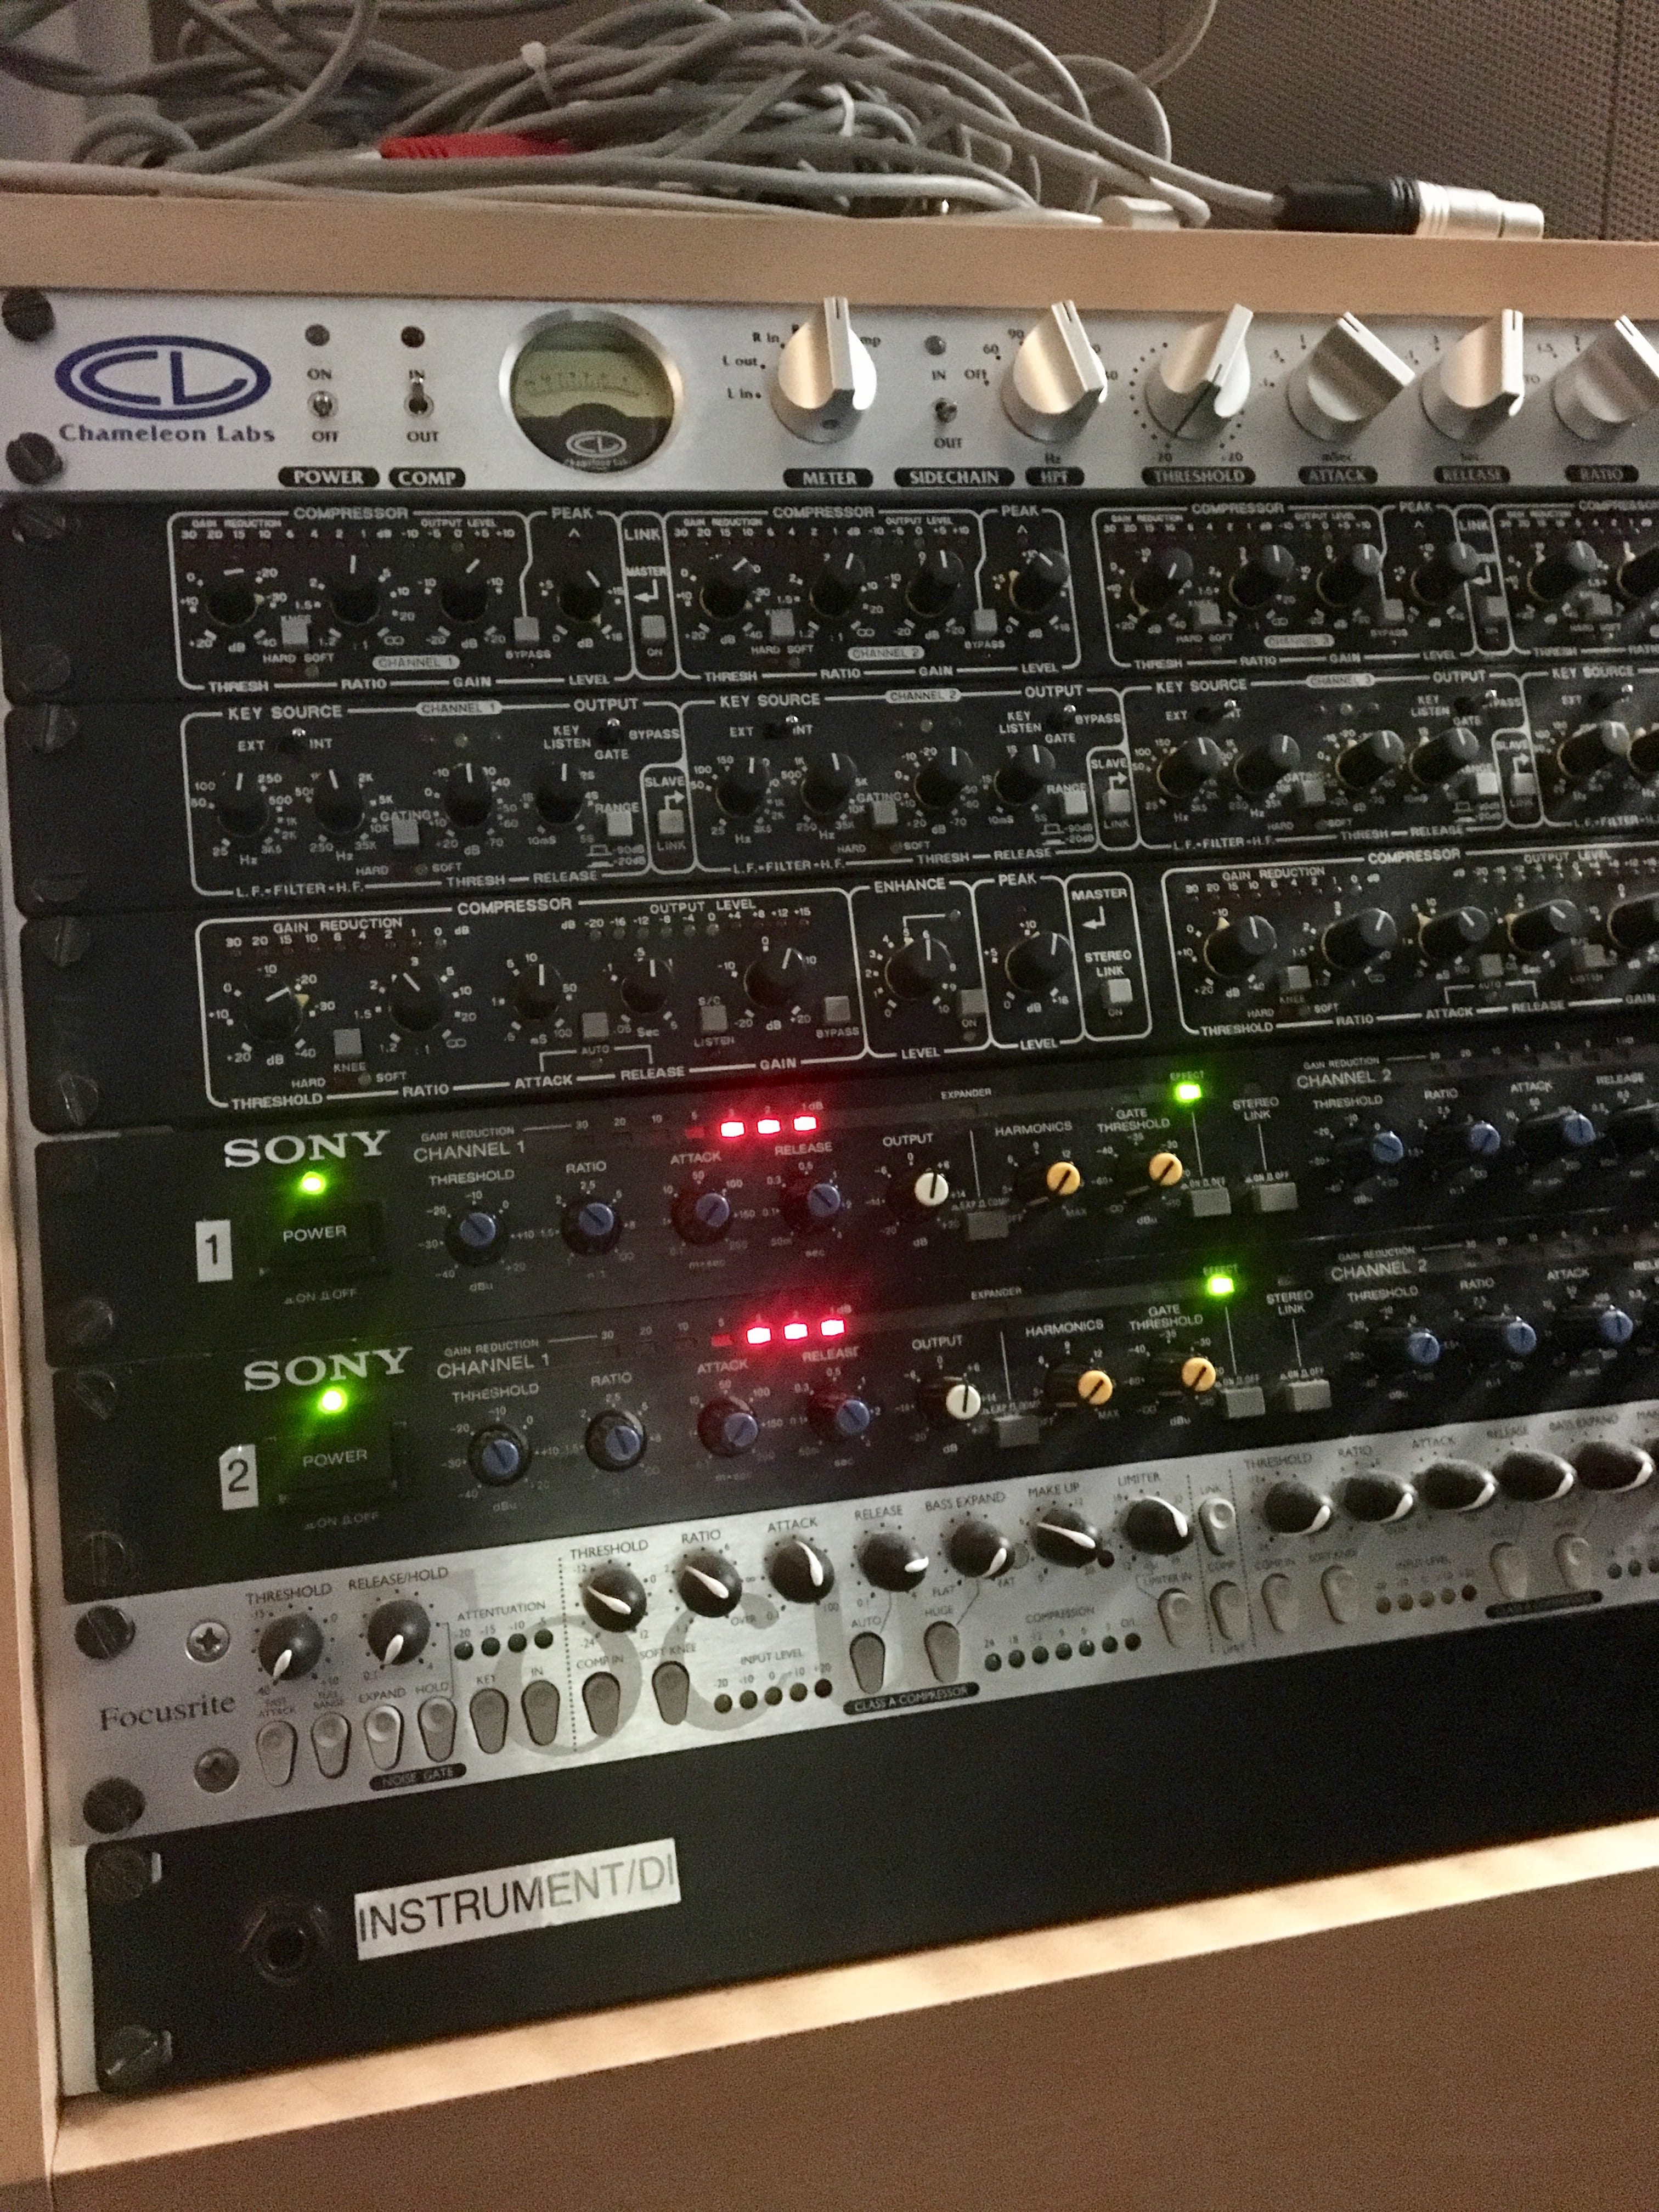
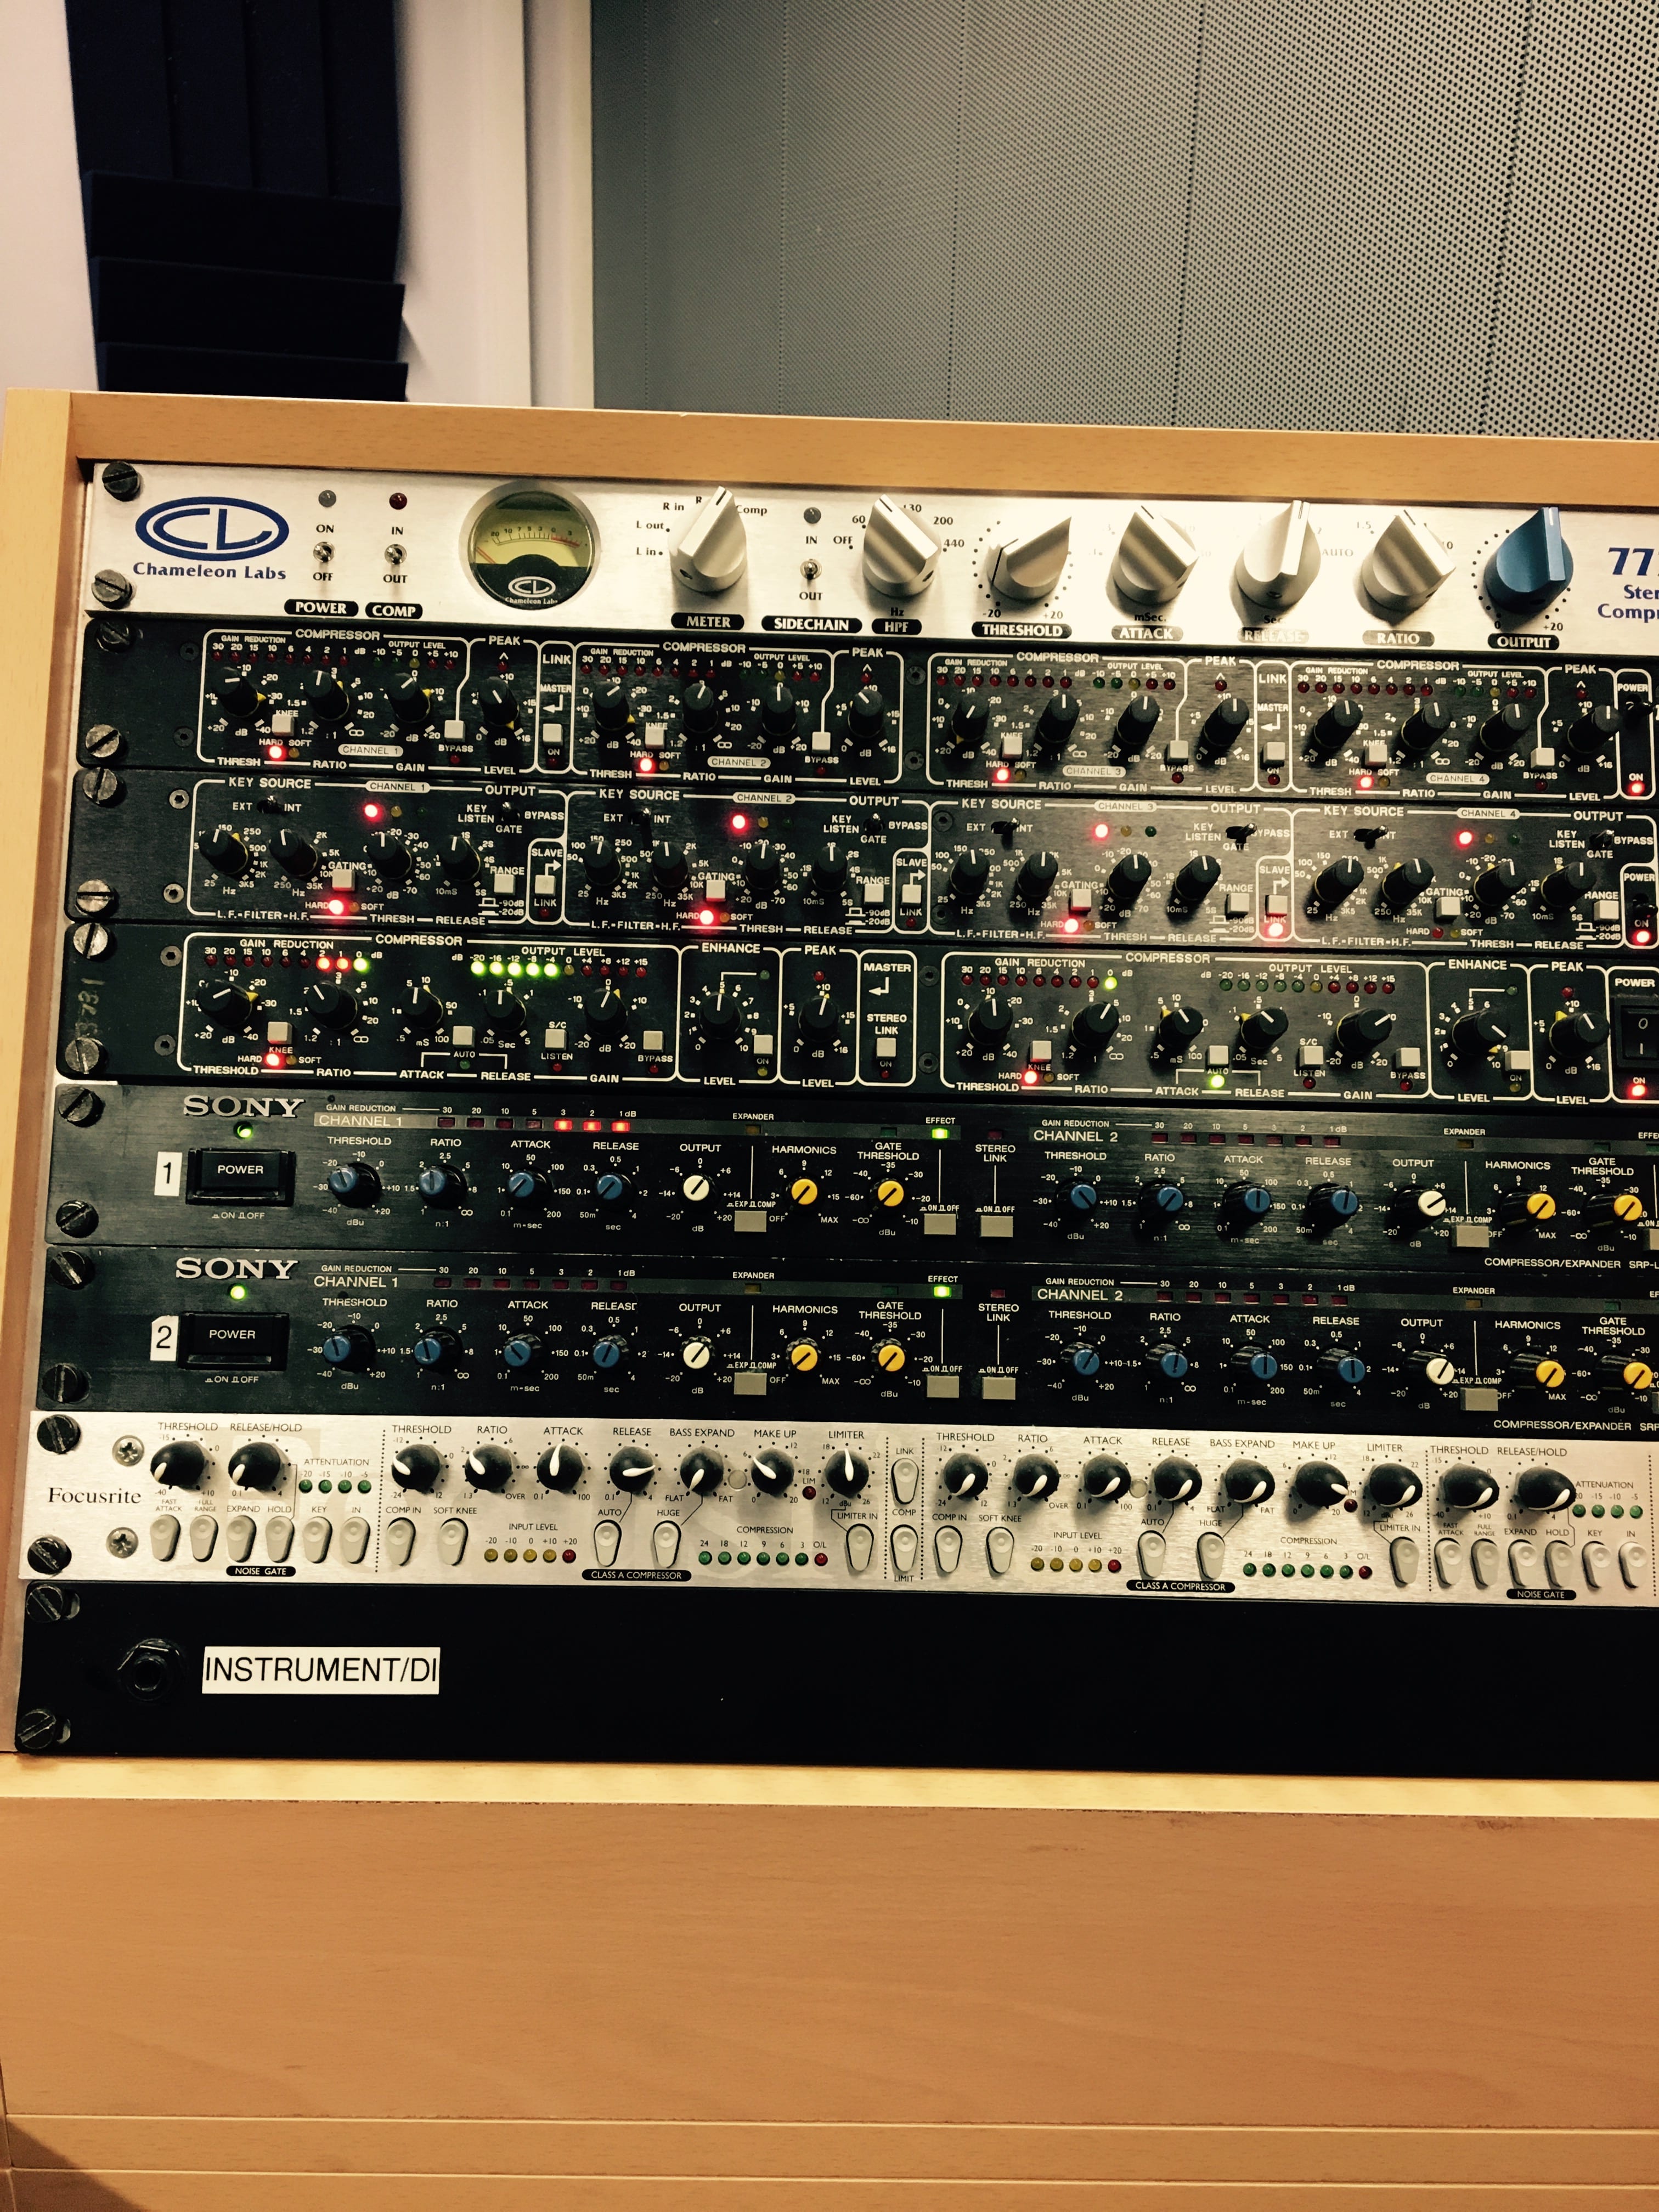
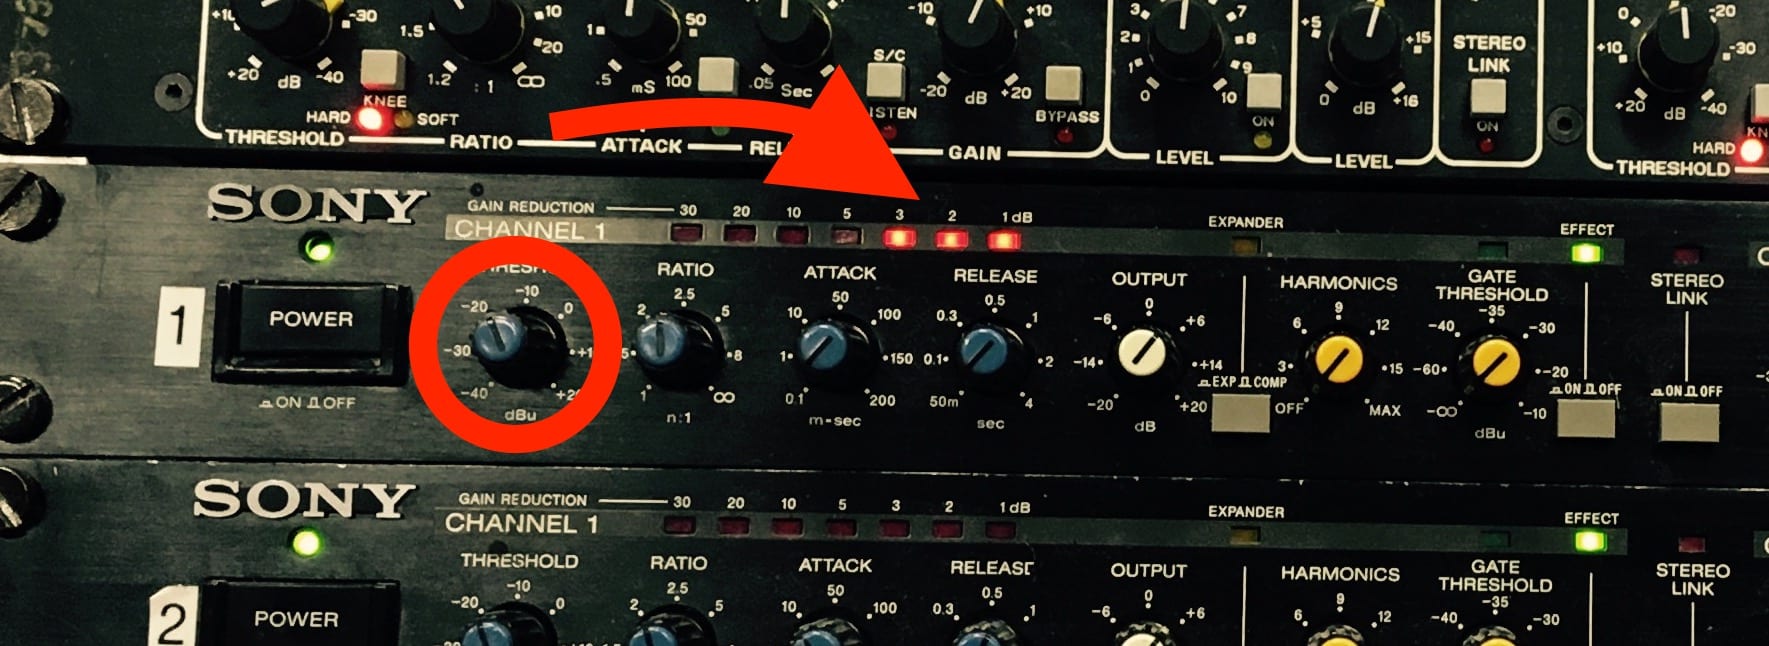
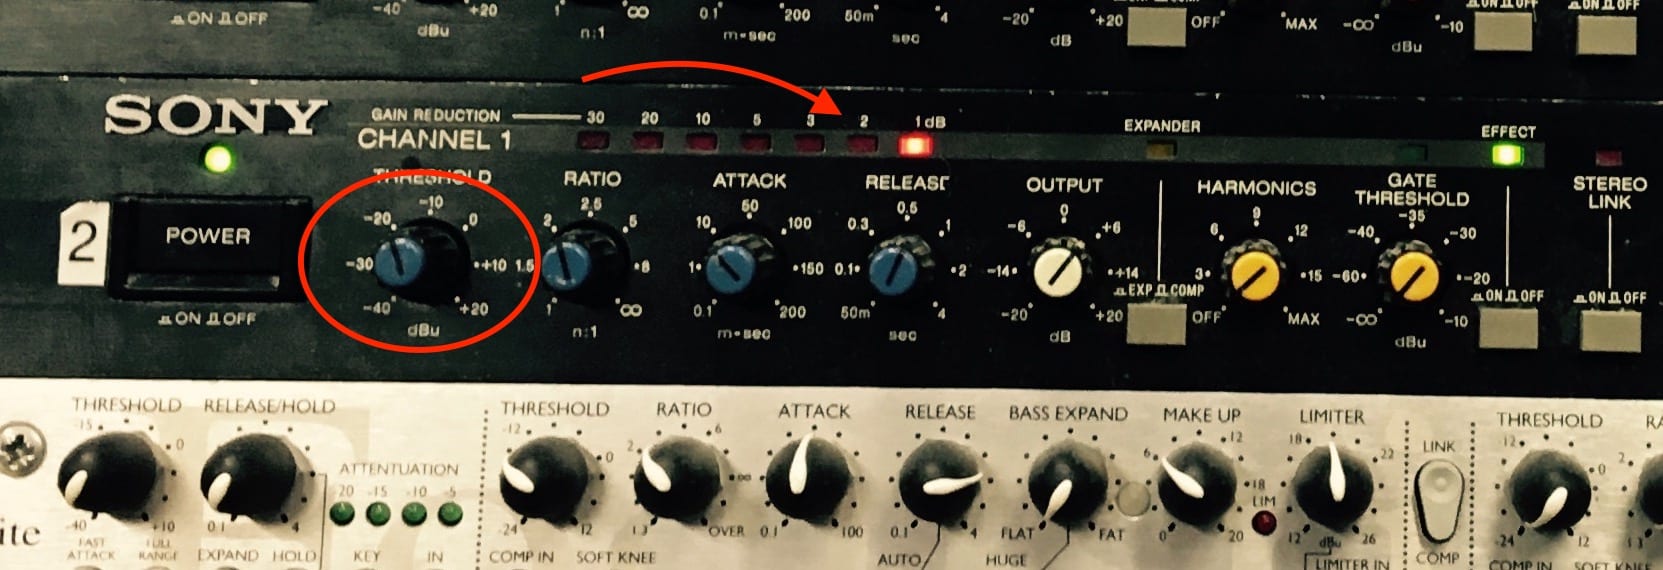
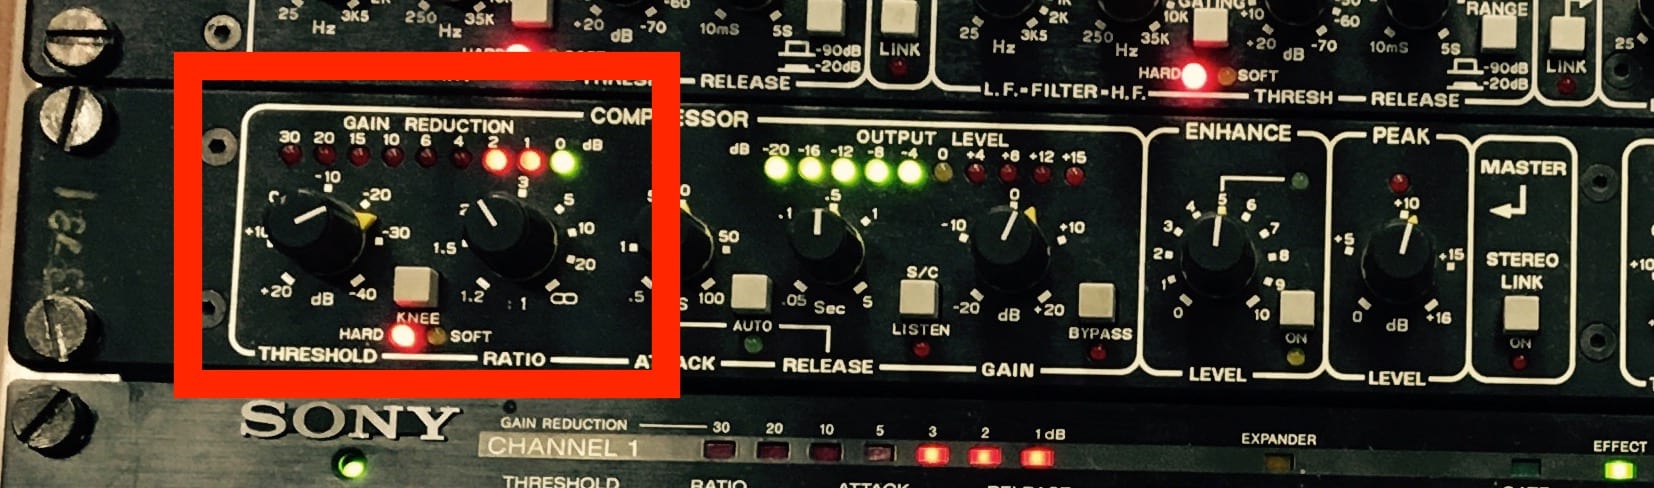
When it came to using hardware compression, I decided to use the Sony srp-l210 on the kick drum and snare drum and use the Drawmer DL241 for the far room mic. From my research, I have found a lot of ways that producers utilise hardware compression into their production and I chose the best ones to suit my scenario and the project. Jacquire King, producer of James bay’s debut album, spoke to sound on sound magazine about his use of compression on the kick and snare and how he used it to help the drums sit in the mix better. He uses a low ratio with about 3db of compression to prevent sucking the tone out of the drum allowing them to be more stable whilst adding focus. With this in mind, I also used this method to control the dynamic range of the snare and the kick drum.

Kick drum compression:

FullSizeRender

Snare drum compression:

FullSizeRender 4.jpg crop

For the far room mic, I kept the ratio more or less the same however I decided to be a little more aggressive with the threshold. This resulted in the room mic slamming a little more and when mixed in with the rest of the drums, not only did it add ambience, it also added a lot more excitement.

FullSizeRender 2 copy 2

FullSizeRender                                                       FullSizeRender 7

Recording a band with Joe Chiccarelli https://youtu.be/rjFPQFjIEdo

How to EQ a snare drum – Drum Lessons https://youtu.be/a2jgOOOp6UI

How to EQ toms – Drum Lessons https://youtu.be/L3r87s002nM

Jacquire King: Producing James Bay https://youtu.be/mz7ycZzAIoU


Aims, Objectives and Learning Outcomes

For my project I will be working with David Farnan (aka DB Jones) to produce a 4-track solo EP which will involve a full band sound. Stylistically it will have elements of indie, indie rock and pop genres, require me to source an appropriate session drummer and to produce it in such a way that it stands up to and stays relevant with my reference playlist.


Aim:

To work with a client to produce, engineer, mix and master 4 tracks of an EP which they can then readily release onto multiple music platforms.

Objectives:

1. To source a client and make contact with them to discuss what direction they want to take with the EP.
2. Work on pre-production with the client so we both have a clearer understanding of what we want to achieve in the recording sessions to ensure an effective workflow throughout the project.
3. Source the appropriate session drummer and work with them and the client to book all of the required recording sessions.
4. Record all of the required parts for the EP using the different outboard techniques and approaches that i have researched whilst making sure the client is happy with with what has been captured.
5. Edit and prepare all of the recorded tracks and then begin the mixing process whilst specifically focusing on the use of outboard processing and different vocal techniques.
6. Ensure the client is happy with the mixes and then, using the research i’ve gathered, master the EP so it can be distributed to the required platforms.


Learning Outcomes

1. To improve my knowledge and understanding of outboard hardware, specifically eq and compression, by researching the workings of the hardware itself, establishing how other producers use hardware and utilising it in my own work for recording and mixing.

2. To improve the way in which I tackle the workflow of the project by ensuring constant contact and communication with the client, improving time keeping and by looking at how other producers create an effective workflow.

3. To improve the sonic aspects of my vocal production by using different recording and mixing techniques that are inside and outside of the box, and then applying the appropriate ones to my work.

4. Have a clearer understanding of the mastering process by looking at the technical aspects of mastering and what it consists of, having an insight into how other producers master their work and benchmarking this project with my previous work to ultimately master this project to a higher standard than before.