Mix preparation

Now that i’ve tracked all of the required parts for this project I can now begin looking at the mixing process. However before I do, I want to make sure that the session is properly organised so that its manageable and I can give the song my full attention. Chris Lord-Alge recommends keeping this part completely separate from mixing and to look at it from an arrangement point of view. That way you can begin to mix them later with a fresh perspective.

As i’ve already been doing all of the necessary editing, tuning, timing, comping and consolidating prior to this, this process wasn’t as time consuming as it could have been as I’ve been staying on top of it through out the project. However, there were still a few things that I needed to do.

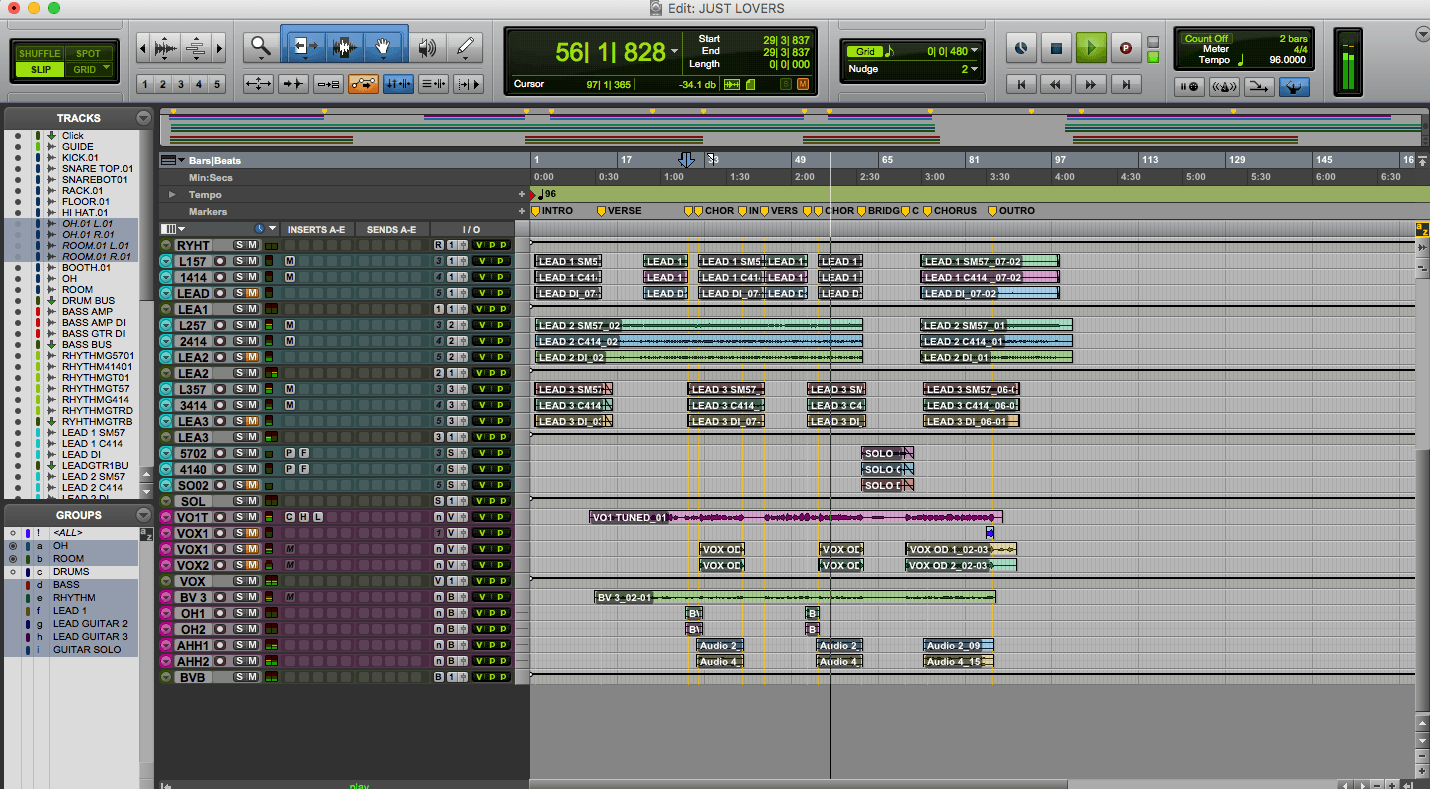
Using some techniques from the masterclass with Chris Lord-Alge I wrote about in an earlier blog post, I began by colour coding all of tracks to colours that worked for me. This meant that I would know where everything was without having to read all of the track titles. In Mike Seniors book ‘Mixing Secrets’, he emphasises the importance of this point by saying that the brain reacts much quicker to colours than words.
I then began removing any silent or unwanted regions in my tracks that I may have missed to avoid unwanted bits of audio leaking through and then continued to fade or cross fade them all to avoid any pops in the audio files. My next step was to condense my session down by combining mono tracks into stereo tracks, removing un-comped versions of different tracks and removing any DI tracks that I wouldn’t be using for the mixing session. Doing this also meant that I wouldn’t have to compromise any parts of my session.

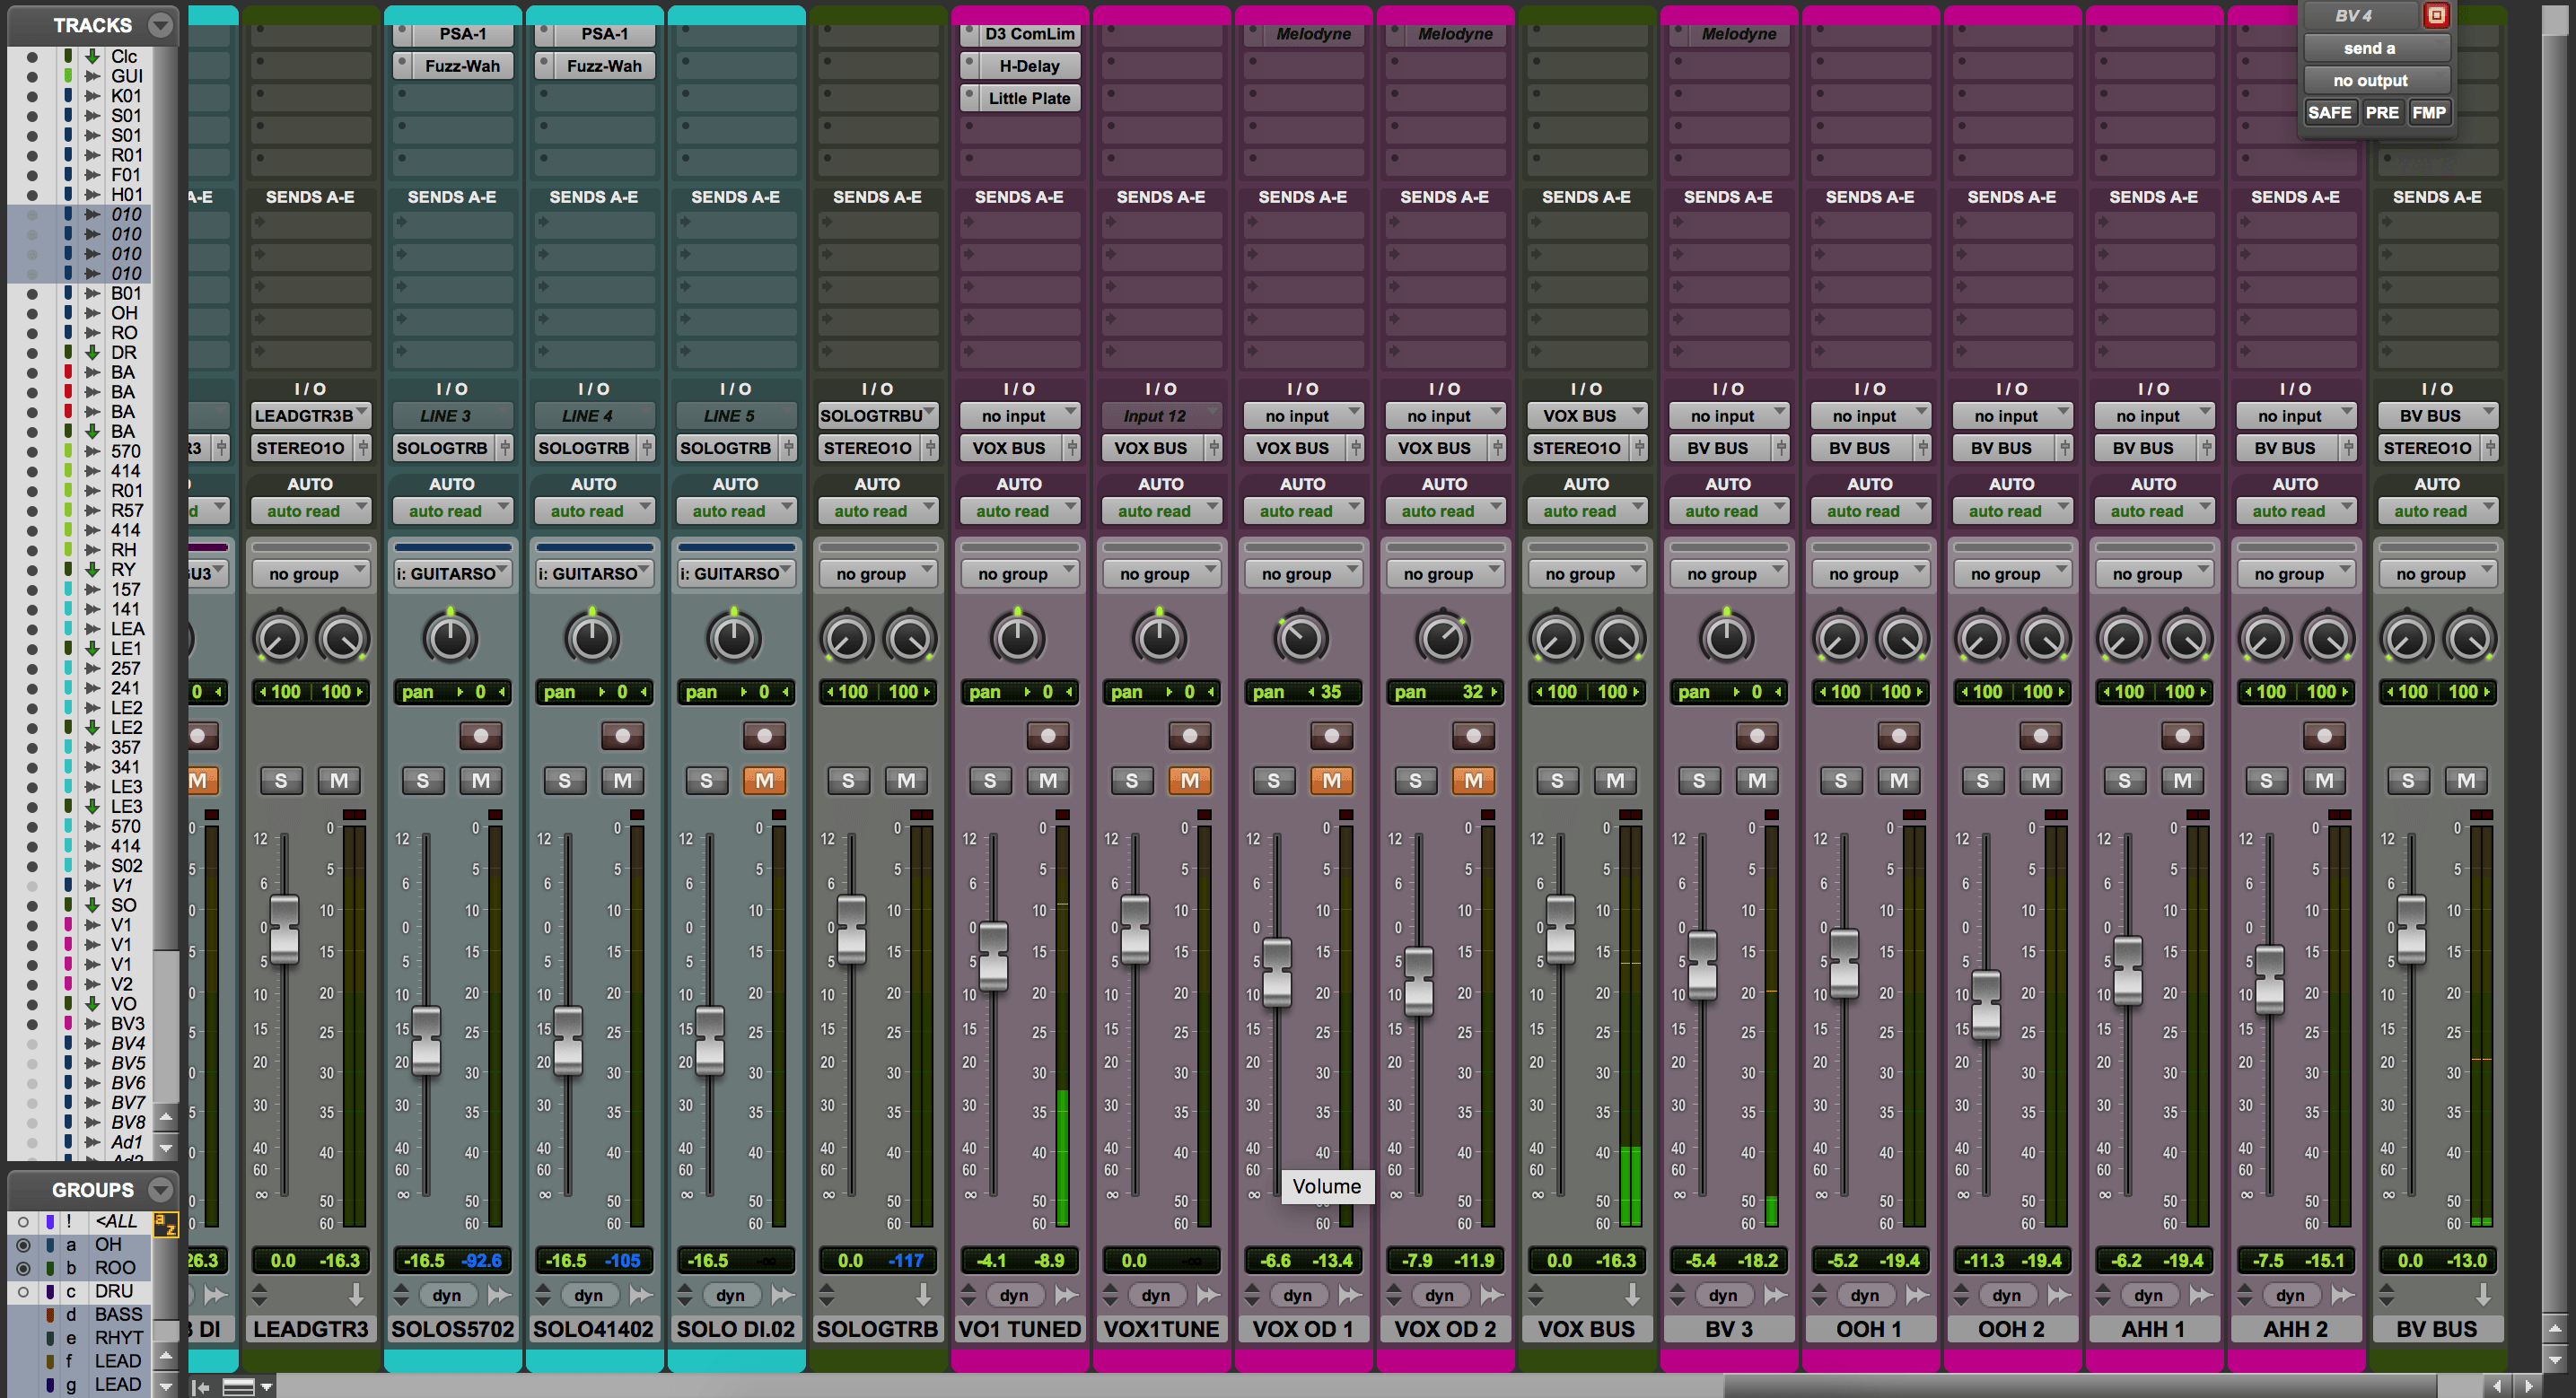
The final task to complete for my mix preparation was to send my tracks to busses or to ‘sub mixes’ as Mike Senior refers to them. This is very useful as it allows me to use processing such as bus compression on the drums and mix bus as well as allowing me use EQ for multi-miced tracks such as the guitars, meaning that i’ll use less plugins and processing power on my computer.

Now that i have completed this task, mixing the tracks should be a lot easier and accessible and I already feel more confident going into the mixing stage compared to other projects I have worked on. This is mainly because I have previously done some minor mix preparation, but not to the extent that I have done with this one.

Here are two screenshots of the mix and edit windows of my session after completing the mix preparation.
Screen Shot 2017-12-07 at 19.24.10

Screen Shot 2017-12-07 at 19.24.28


Mixing Secrets – Mike Senior

Prep work before mixing – Chris Lord-Alge https://youtu.be/Q2_8qkjoxcU


Backing vocal editing

After my recording session at UPR, my next task was to edit, comp and tune all of the backing vocals that I had recorded.

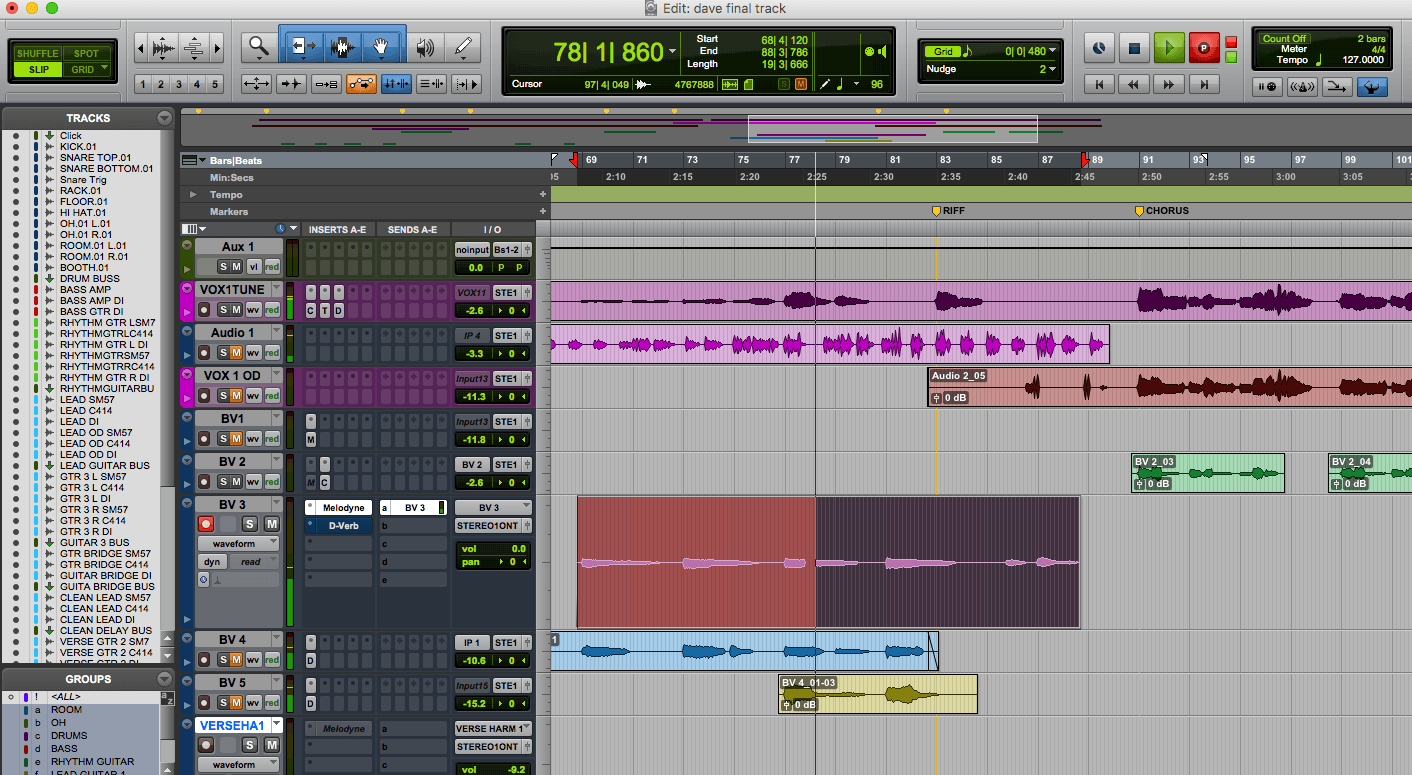
A lot of the techniques applied here were similar to the ones I used in the lead vocal editing post. I began by removing any unwanted bits of audio and used fades to remove any pops. The next step was to run all of the backing vocals through melodyne in an attempt to tighten them all up. Melodyne proved very beneficial here as it helped them sit better alongside the lead vocal, especially the harmonies, and it allowed me to be more aggressive with the tuning as they were going to sit lower down in the mix compared to the lead vocal.

I then recorded the track back on to itself via a send as oppose to recording it onto a new track. Although this is more destructive, I can still keep melodyne inactive on the inserts section which allows me to return the file to its original state if I do ever need to revisit them. Keeping melodyne inactive also prevents it from using up unnecessary power on my computer.

Screen Shot 2017-12-03 at 23.04.51


Backing vocal tracking

For todays session we focused on tracking all of the backing vocals for the project. This was also the last recording session of the project before the moving onto the mix prep and mix stage.

Due to the availability of the multi track studio and a fault in studio 3, I was unable to get into either studio for this session which posed as a potential problem. However, I was fortunate enough to know someone how owned a small studio called UPR Records a few miles from where I live where I could record these last parts. I told the owner about the project I was working on and he agreed to let me use the studio for a few hours.

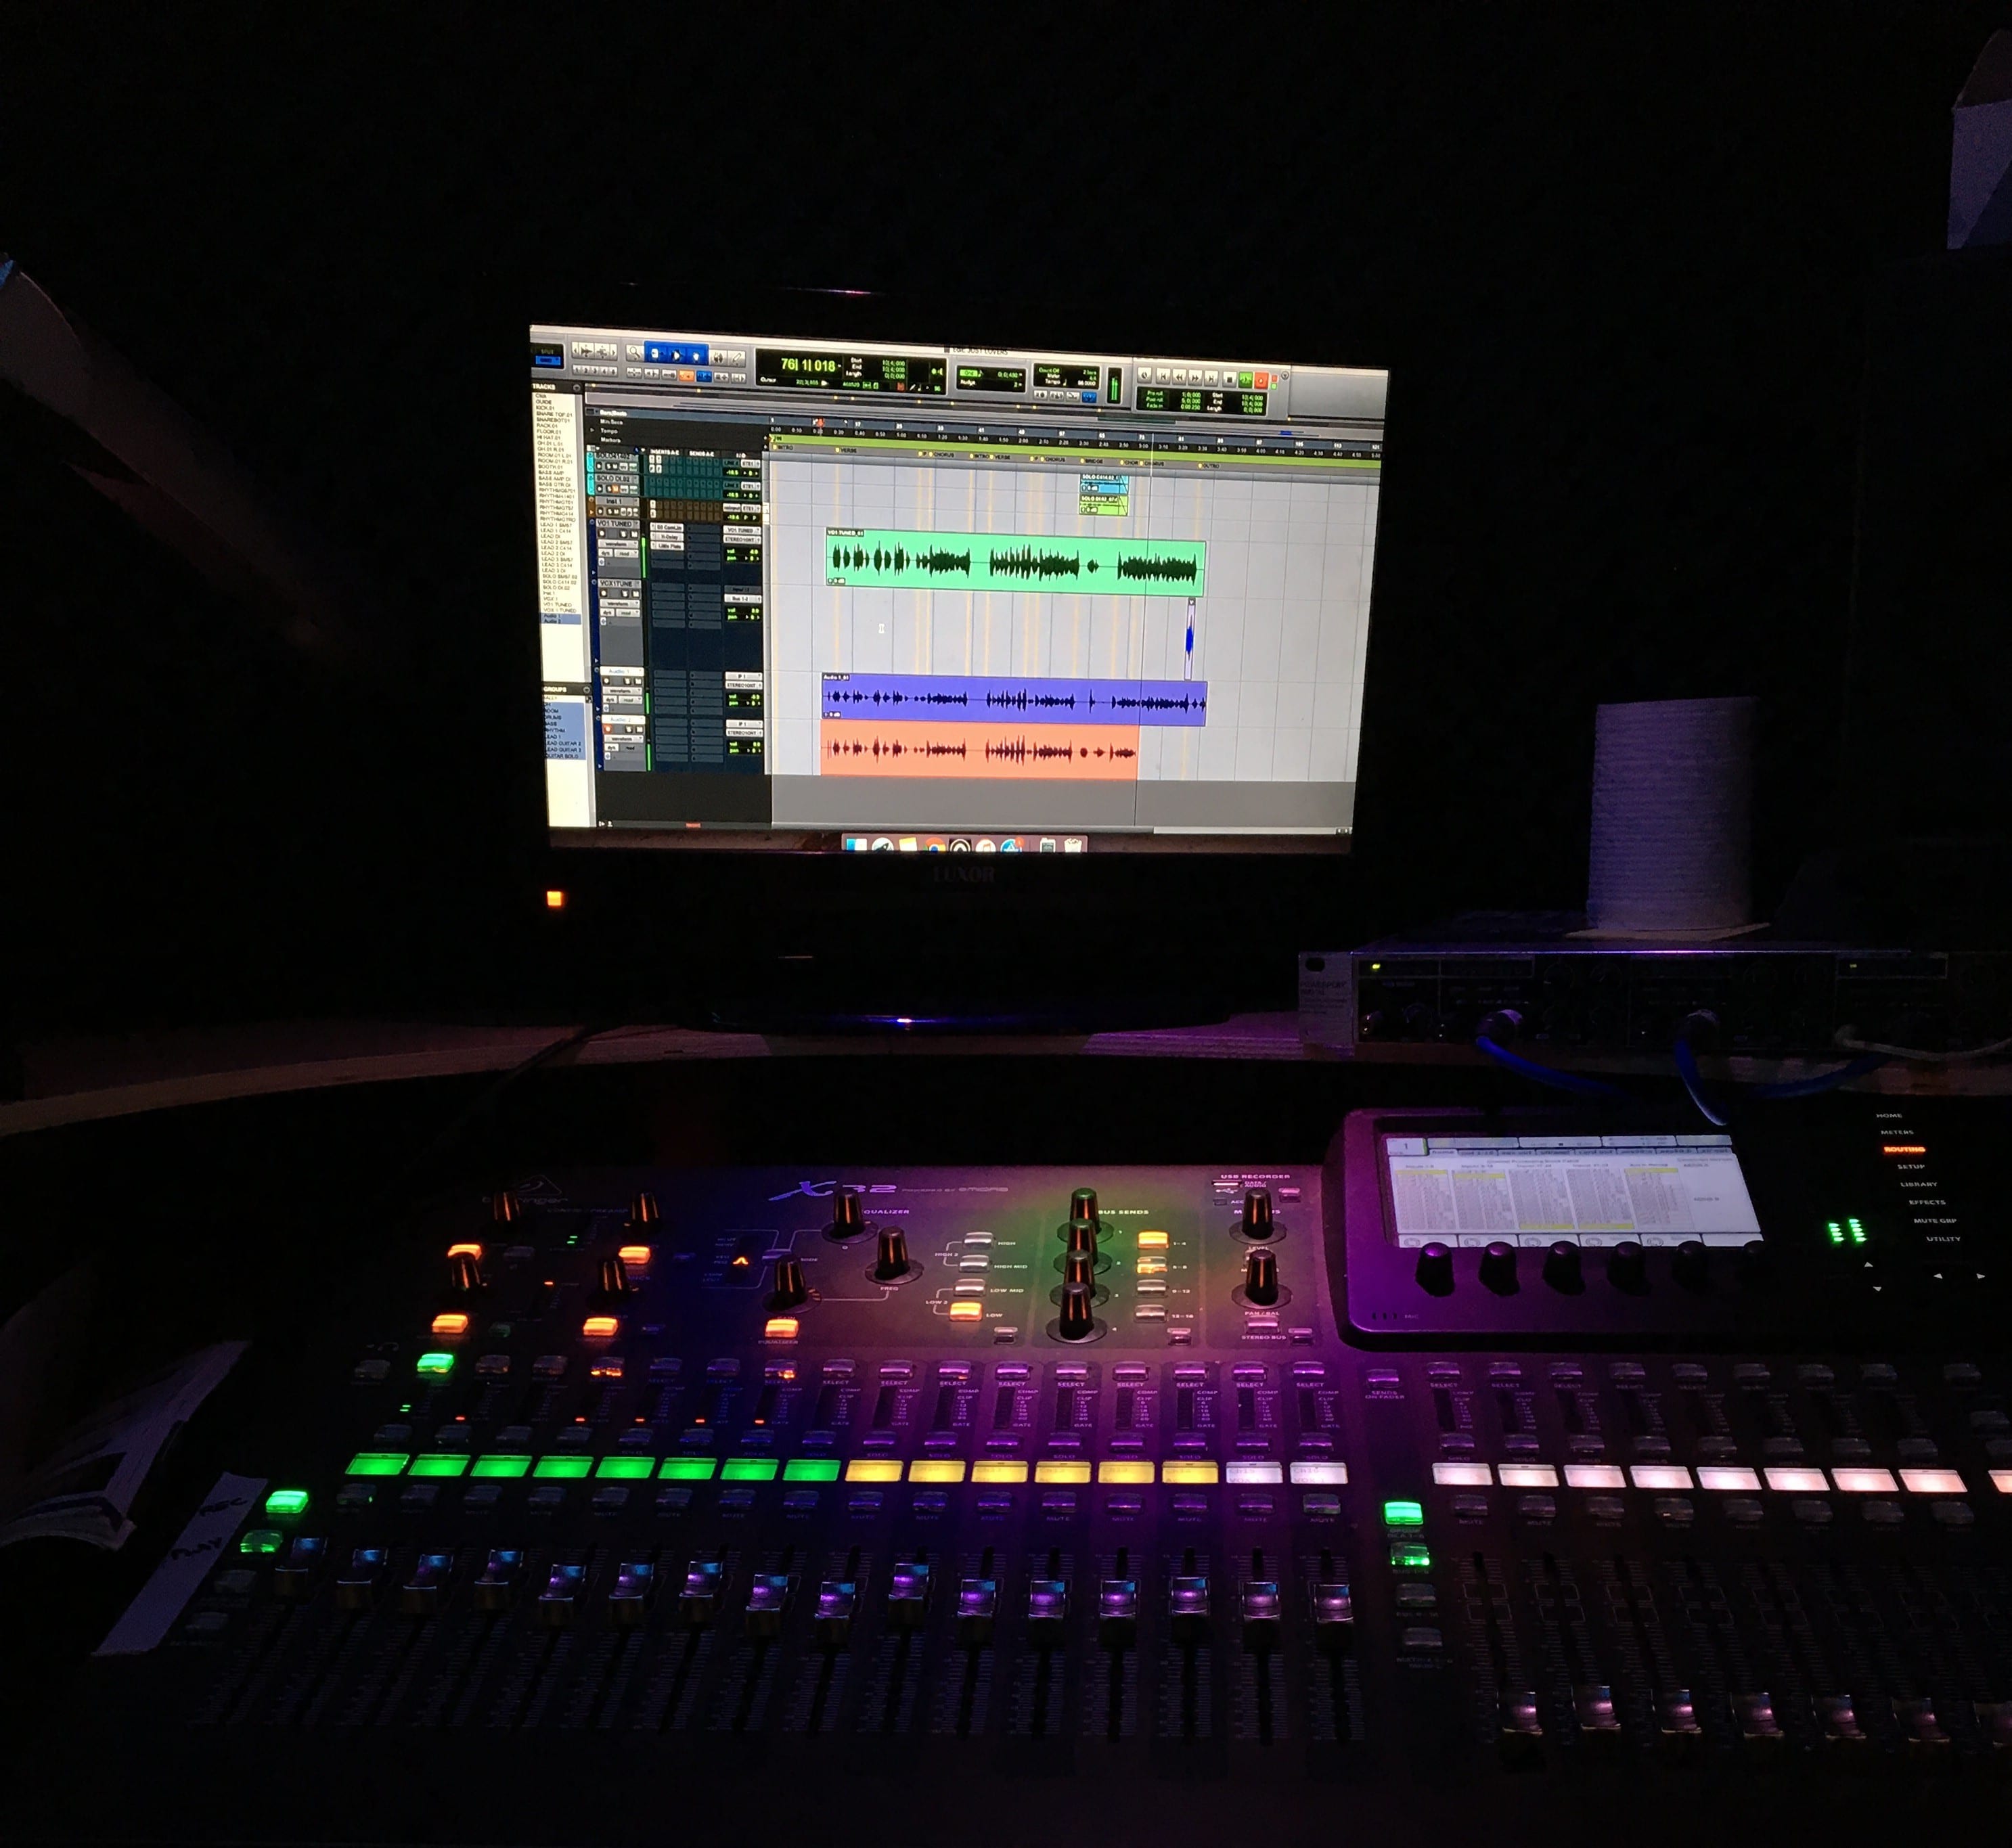
Working in UPR allowed me access to some different hardware as well as some different microphones. The studio was equipped with a Behringer X32 digital mixing desk which allowed the use of numerous forms of processing before sending the audio into Pro Tools. The studio also had a Rode condenser mic which I found to be a little thinner sounding compared to the AGK C414 i’ve previously been using.

In terms on processing, I applied a lot of similar techniques I used back in my lead vocal tracking session. I used the built in HPF to remove everything below about 60hz and the built in compressor to reduce the dynamic ever so slightly. It’s important to note that i didn’t go too excessive with the EQ and compression here mainly because I wasn’t use to the room, the sound of the hardware I was using and the monitors I was listening through. Being subtle with the processing also meant that I could take it home and process it further on speakers that i’m more comfortable with.

IMG_6573


The Loudness War

When planning ahead for the mastering part of my project, this video shows that I need to retain a good dynamic range within my audio to help it stay clear and natural.

Grant Leung suggests that years ago albums were produced with a lower dynamic range so they remained clear and easier on the ear. However, years later with the addition of record companies wanting to make of an impact in the industry, they are being produced to be as loud as possible in an attempt to rival the competition. This is resulting in music to lose it’s natural dynamic range and tonal qualities just so it can bumped up as close to zero as possible. The information presented here is also similar to the video by James Wiltshire when he talks about K-Meter and is something I am also guilty of in my previous work.

Grant also suggests that the ‘loudness war’ reached a pinnacle in 2008 with the release of Death Magnetic by Metallica with it being clocked as the loudest album ever. However, it received a back lash from fans due to its poor sound quality and low dynamic range making the whole issue around the loudness war pointless.

When implementing this onto my project, it is clear that during the mix stage I need to ensure the tracks have enough natural dynamic range, are all at a good level and then when it comes to mastering, make them loud enough so they stand up to their competitors without over compressing and making them lose their dynamic range.


Tutorial – Week 10

This week me and Ben took a listen through all of the lead vocals that I had comped and tuned as well as all of the blog posts I’d added since last week. We spent most of the tutorial listening through all of the tracks and then discussed some possible backing vocal ideas that could help fill all of the tracks out.

With regards to my blog, as the majority of my posts are still in draft form, Ben recommended that I begin publishing them for next week, even if they do need editing, so we can begin to see how my blog will look when all of the posts are in it. Doing this will mean that it will be easier to see how I can improve my blog.

He also recommended that I try and write as many blogs posts as possible and to record all of the backing vocals ready for next week.