Week 9 – Lucy Johnstone

Today’s lecture was given by Lucy Johnstone who is a freelance sound editor and re-recording mixer.

To begin, Lucy spoke to us in depth about some of the technical sides of recording voice overs and the best ways to capture and edit them. She suggested that some of the good ways to improve the overall sonic qualities of voice overs was to use VO trim, remove breaths and to remove lip smacks. She also recommended to use a small buffer size when recording voice overs to avoid echo and latency issues for the actor/narrator and that it is more important to spend more time on perfecting the dialogue as oppose to the SFX. In these scenarios, its 30% what you know and 70% how you are with client.

She also spoke to us about some of the other technical aspects of her job with regards to SFX, ambience and track laying/organisation. For ambience, she recommended that it’s best to have them in stereo so they can immerse the viewer, never loop the beginning of an ambience track, use different takes and clips for background sounds to prevent them from sounding repetitive and that Izotope RX can be a great tool to help match different takes and ambiences. For spot effects, it’s best to keep these in mono so it leaves you with more options and finally for track laying, she recommended putting tracks in banks of 4 or 8 to help organise the session. She also recommended that you ask the offline editor for handles, never cross two pieces of music and to speak to the director if you’re unsure whether they prefer long or short fades.

Aside from the technical side, she also gave some advice on how to get into the industry and what it can be like once you are in the industry. She suggested that work experience is crucial if you want to get a job in the industry and that finding small companies are good for moving up, however they may produce less high-profile shows. Working in house at these companies is also a great way to gain and experience and credits making it a lot easier if you decide to go freelance. This is also the route that Lucy took.

When working on a production, it’s important to fight your corner if you feel passionate about something however, at the end of the day it’s the director who makes the final decisions and knowing when to back down is important as you won’t be putting your job in jeopardy. A good thing to know is that dramas normally prefer to use boom mics and documentaries prefer clip mics with documentaries having a much faster turnaround of programs compared to drama.

I felt this lecture provided a great insight in the world of sound editing and re-recording within the industry, especially from a freelance perspective. The tips Lucy gave were very useful as freelance working is something i’m looking at once I leave University.
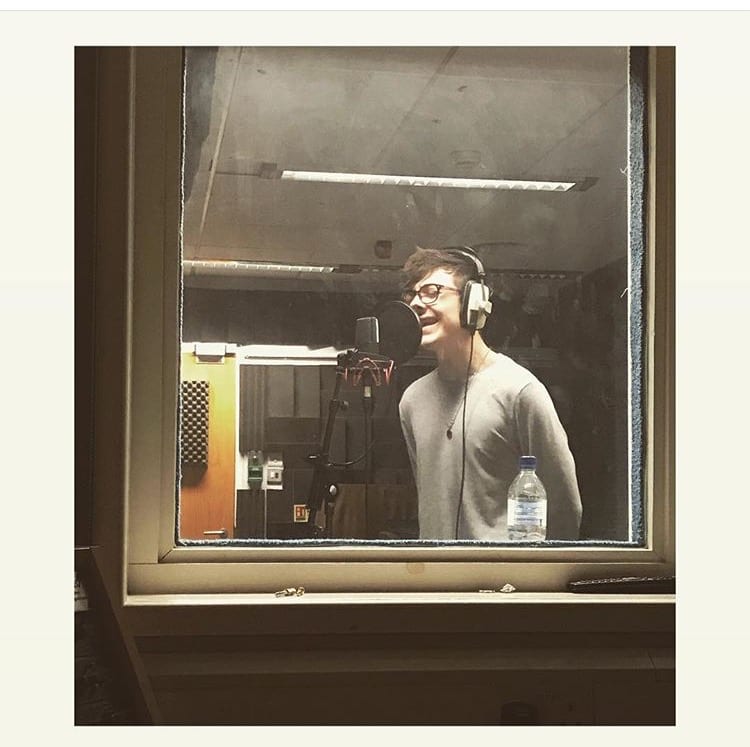
Lead vocal recording

Today the main objective of the session was to record all of Daves lead vocal parts whilst making sure that i touched on learning outcome 1 and learning outcome 3.

From my research, a common technique applied by a lot of the big producers is to use a valve condenser microphone running into an independent (sometimes also valve) hardware pre-amp, through an external compressor and then into Pro Tools. For example, Jacquire King likes to use his own Sony C37A through a Neve 1073 or a 1081 and then run it through an LA-2A compressor. Jim Abbiss on the other used a Neumann M149 valve microphone on the Arctic Monkeys debut album which he then ran through a UA 1176 compressor. I used this research to inform my own decisions at the beginning phase of vocal production.

Unfortunately the uni don’t have any valve microphones so instead I opted for the AKG C414 due to its flat EQ response. I used the pre-amps on the Audient desk and then ran the signal through the Drawmer  DL241. When applying the Drawmer into my signal path, it was clear that its main use was going to be catching some of the harsh transients coming from Daves voice and before relying too heavily on the Drawmer, I asked Dave if he would be able to pull back from the mic a little bit when singing at a louder volume. However when he tried this I felt like the vocal performances were not a lively and I decided to apply harder compression on the Drawmer to combat this.

Once setting the threshold and the ratio, I altered the attack and release time to try and catch some of the transients, with this technique being inspired by Jimmy Douglass. Doing this helped to reduce these transients significantly however there were still a few transients that were slipping through and I think this mainly down to the compressor not a having a short enough attack time. I could’ve combatted this by adjusting the ratio and threshold eve further however I decided not to so that I didn’t run the risk and of over compressing and squashing the signal.

Once I was happy with the signal going into Pro Tools I recorded a few takes of each track so that it gave me more options during the editing and comping stage.

FullSizeRender

Jim Abbiss https://www.soundonsound.com/people/jim-abbiss

Jacquire King, Lowell Reynolds & James Bay: Recording Chaos And The Calm https://www.soundonsound.com/people/jacquire-king-lowell-reynolds-james-bay-recording-chaos-and-calm

Mixing Justin Timberlake Vocals – Jimmy Douglas https://youtu.be/PpIanhvC9qw


Tutorial – Week 8

This week me and Ben spent quite a bit a time looking at how the tracks were coming along with regards to the tracking/production process.

Specifically, when I showed Ben my work so far, the main thing we focused on were the vocals mainly because I had only recorded them the night before and they hadn’t been edited. We both agreed that all the tracks would benefit from some comping as well as some pitch adjustments via melodyne due to some tuning issues. Ben also recommended that I complete all of the comping and tuning before tracking the backing vocals so that Dave can pitch to them better. We also discussed some different production techniques I could use on the vocals such as reverb, delay and automation to help it sit in the mix better.

I also spoke to Ben about some of the EQ issues I was having with a guitar track on one of the tracks, the main issue being that the low/low mids were fluctuating quite heavy when different notes were being played. He suggested that it might be a good idea to go as far as automating the EQ thoughout the track or to use a multi-band compressor to combat this.

Guitar editing

To ensure my workflow stays as effective as possible, I spent a few hours before vocal tracking editing all of the guitar takes I had recorded. This is a similar process i did for the bass editing.

First of all I made sure all of the different takes had been comped and cross faded into one another to avoid any weird pops and to ensure all of the edits were smooth.

Although I made sure that both mics were the same distance away from the amp during the recording process, I still checked the phase alignment, especially against the DI signal, of the two mics and ensured they were both fully in phase with one another. This led to a more effective vocal session and again, will save work before the mix stage.


Screen Shot 2017-11-08 at 14.36.24

Guitar tracking / session 1

For this session we focused on guitar tracking, specifically the rhythm guitars with the addition of a few lead guitar tracks. We actually managed to record the rhythm guitar tracks for ‘Wake Up’ at the end of our last session as we already had quite a good idea of how we wanted them to sound, however we weren’t quite sure for the rest of the tracks so this required a little more time to experiment.

The foundation of the rhythm sound ended up consisting of a Fender Telecaster running through my Orange Rocker 30. I then used a Shure SM57 and an AKG C414 on the guitar cab and took a DI signal from the guitar into the desk as a back up incase I wanted to re-amp it. Once we had experimented with different tones, it was clear two of the tracks needed to quite a crunchy guitar tone whilst the other two required a warmer, less gained sound to compliment the style of them.

Once we were happy with all of the rhythm tracks we moved onto the rest of the guitar parts such as leads and cleans. A great thing about this was that each of these tracks all required different tonal qualities which allowed us to experiment with various pedal delays and modulation which we printed into Pro Tools.