Reflective Summary

Overall, I feel this project went really well besides a few issues that came about towards the end of the project. There were pros and cons to each learning outcome which I will go into detail about.

In terms of achieving learning outcome one, I feel the project started very strong, however my engagement with it decreased towards the end of the semester. With the exception of guitar recording, I was able to utilise hardware compression and/or hardware EQ into each tracking stage of my project. I feel this really excelled in the drum tracking process as I was able to use both by compressing the kick drum, snare drum and room mic as well as using the desk EQ to remove problem frequencies which would save me time and processing power when processing them in Pro Tools. As the EQ on the desk is all analogue, I also took this opportunity to boost certain drums such as the low end of the bass drum and snare to add a bit more warmth as well as the top end of the overheads to add shine and crispness to the cymbals. This all resulted in a bunch of really nice sounding drum take after I had dealt with all of the phasing issues.
However, achieving the second half of this learning outcome wasn’t so successful as when it came to using the hardware during the mixing stage, I was unable to find any free time in the studio to utilise the hardware. I knew from the beginning that studio availability would be tight, especially towards the end of the semester, so I set myself a target to at least use the hardware to apply some parallel drum compression to my sessions. However, I underestimated how busy it would be and unfortunately wasn’t able to do any parallel compression at all. The nature of this process was always going to be completed towards the end of the project as it could only be done once I was happy with how my fully processed drums sounded, however had I reached the mixing stage earlier, maybe I would’ve been able to engage more with this section of the learning outcome. I also feel I could’ve been aggressive with my EQ and compression had there not been so much spill coming from the live room into the control, particularly in the lower frequencies.

Besides some of the time keeping issues that came about towards the end of the project, I feel my second learning outcome was really successful. By keeping constant communication with Dave I was able to make sure that he was happy with what had been recorded and edited every step if the way. The way that Chris Lord-Alge tackles the workflow has also had a massive influence on me and made every recording session a lot easier because I had done the necessary preparation before hand. This combined sense of preparation and effective workflow meant that I was able to tackle the mixing process more efficiently and allowed me mix the tracks quicker than I ever had done. This also meant that I had more time to send the mixes to Dave so that I could make revisions for him in the mix. This is definitely something that will have a major impact on how I tackle future sessions.

Learning out come three was also one that I feel went really well. The initial use of the hardware compression really helped send a more dynamically stable signal into Pro Tools which proved to be more manageable and easier to work with when it came to the mixing stage. As well as this, I also found that by comping and tuning the lead vocals before the backing vocals really helped improve the overall performance that Dave gave when recording the backing vocals. Due to the studio being so booked up when Dave was available to record the backing vocals, I feel that choosing to record them in a local studio which was closer to us helped us overcome this issue and provided a great new environment capture these allowing me to get hands on with some new equipment that I might not normally have been able to.
In terms of vocal processing in the mix stage, I really feel like my engagement with other producers such as Jimmy Douglas and Andrew Scheps, in combination with the outboard processing, has really helped me improve the overall sonic qualities of my vocal production. The use of the doubler has been something i’ve always wanted to try out and this project has been a great opportunity for me to do so. By integrating it into my work my vocals sound a lot more wider, bigger and professional when stood up against other commercially released tracks.

Some of the research i’ve acquired around my mastering learning outcome has not only given me more knowledge on the technical sides of how to master, but also how to get the best out of the tools that i’m using to master my project. The research from James Wiltshire really helped me mix to an ideal level that would help me get the best out of the mastering process and helped me get the best out of my plugins when mixing. The Loudness War also helped me understand that its okay to make your tracks loud but to do so in a way that doesn’t ruin the dynamic range and overall tonality of the music. If I had to pick a way that I could have improved this learning outcome, it’d be that it wouldn’t have hurt to have a few more sources of research to inform my mastering process a little more.

On reflection, the ways that I could have improved my role as the producer for this project would have been to improve my time keeping a little more when working to a deadline such as this and to gather more research to inform and influence how i tackle the mastering process. However, the achievements in this project have meant that i’ve found new and great recording and mixing techniques which will carry over onto new projects I work on with this project being probably one of the best sounding projects i’ve produced. As well as this, my research has also introduced me to some great analogue equipment that I may have been unaware of had I not put the research in. I also fee like using the reference playlist has helped me produce a bunch of songs that stand up to the similar released material and played a big part in helping shape my decisions during the mix stage.
Mastering

Now that Dave is happy with all of the mixes I have sent him, I can now begin the mastering process so that he can release them for public consumption. It was important that I got the mixes to sound as best as possible as I wouldn’t be able to alter the levels during the mastering process. The aim of this mastering session is to improve the overall sound of the songs by making dynamic and tonal changes so that they sound like they should all fit together.

Before I began mastering, I mixed the tracks to way so that the overall levels weren’t too high or too low and I did this by keeping them between -15 and -10, utilising the research presented by James Wiltshire in the K-Metering video. This way I had enough headroom to apply EQ, compression and limiting. I based a lot of my mastering techniques on Warren Huart from Produce Like A Pro as he takes a very DIY approach, which is similar to what i’m doing, but also from Jonathan Wyner from iZotope and Graham from The Recording Revolution.

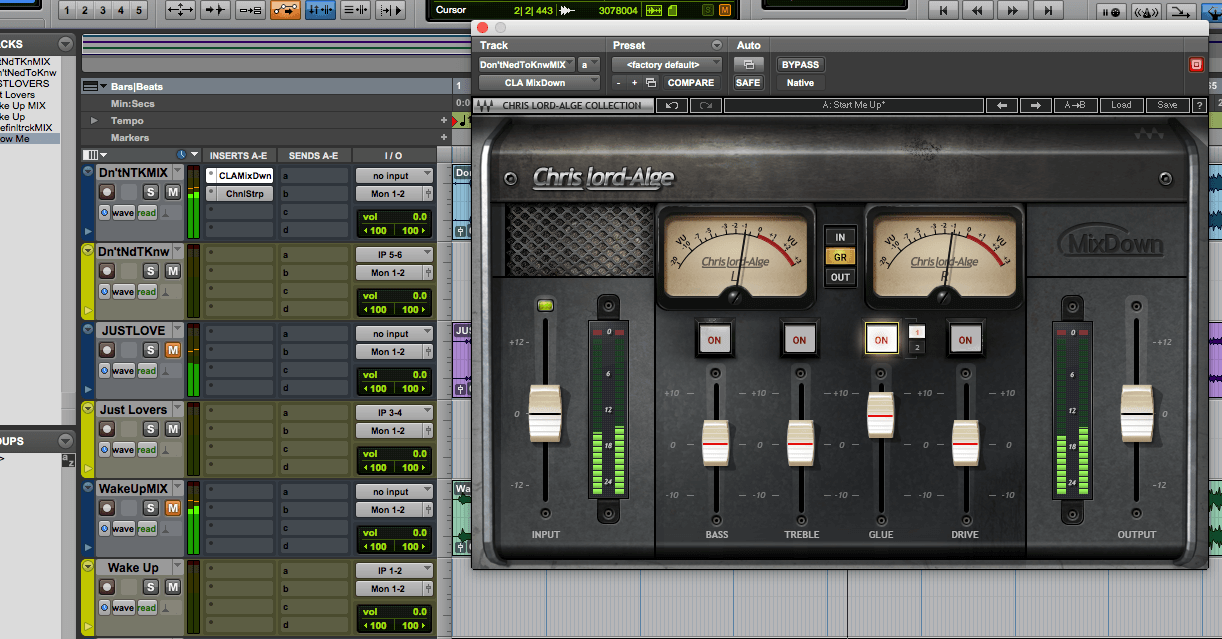
Once I had loaded the stereo mixes into a new protools session, I began by applying compression to the tracks using the compressor on the CLA mixdown. My aim was to achieve around 2-3 dbs of gain reduction to control some of the sharp transients and to help the song glue together more efficiently. However, I was careful not to over compress the tracks to avoid some of the issues surrounding the loudness war which I referenced in an earlier blog post. I also compressed them in such a way that the tracks all had a similar dynamic range and were all consistent with one another.

Screen Shot 2017-12-15 at 14.40.15

The next step was to improve and alter the tonal characteristics of the tracks so that they were all coherent with one another. I used Warren Huarts Home Mastering Tips as a template by doing the following:

  • Cutting out super lows at 20hz by using a HPF.
  • Boosting the kick drum at 60hz by 0.4db.
  • Cutting 350hz by 0.2db as it can cause problems and take up room due to the build up from the bass and low end of the guitars.
  • 1db boost at 7khz to add a little more presence.

This was a good starting point however i then altered these slightly on each song so they were more coherent with one another whilst being close to the reference tracks.

Screen Shot 2017-12-15 at 14.53.22

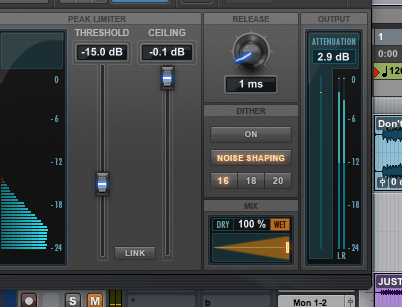
When I was happy with the tonal changes I had made, i then used a limiter on the tracks so that they could be delivered to Dave at the appropriate volume. Using the stock limiter in Pro Tools, I set the ceiling to -0.1 dB  (some CD players distort if its set to 0) and then set the threshold accordingly to each track so there was no major volume jump or dip between them. The aim here was to try and achieve around 2-3 dB of gain reduction. This is so that they were loud enough to compete with their competitors however, they weren’t being push so hard that they lost their dynamic range and began to sound squashed.

Screen Shot 2017-12-15 at 14.46.39

Screen Shot 2017-12-15 at 15.00.22

It’s also important to note that although I made the tonal and dynamic alterations to make them coherent with one another, they were also altered in a way so that they sounded similar to their reference tracks. For example, Just Lovers was referenced alongside ‘Chocolate’ by The 1975 and ‘Follow Me’ was referenced alongside ‘Bonfire’ by The Hunna.

Using this method as template for my mastering session has helped all of the tracks glue together and sound like a really coherent release. I have employed similar techniques in my other work however they have not been to the same extent as the ones I have applied here. I have been guilty of just trying to make them as loud as possible with taking enough consideration about their dynamic range and EQ.

When listening to them alongside my Spotify reference playlist, I actually found that they were louder when the volume in the Spotify player turned up to full. This is great for for making them stand up to their competitors however it might just be because the tracks in Spotify are a Ogg Vorbis format and my tracks are 16bit Wavs.


Mixing vs Mastering – What’s The Difference?
https://youtu.be/DekX3nq5fNE
 Graham from the Recording Revolution

iZotope – What is Mastering?
https://youtu.be/022zPbJoKbo
 Jonathan Wyner

Vocal Mixing

As i’ve previously mentioned, a big area that I want to focus on for this project is implementing new techniques into how I tackle my vocal production in the mixing process in an attempt to improve the overall tonal qualities and how they sit in the mix.

Now that i’ve got my comped and tuned vocal tracks, I began by separating the verses from the chorus’s on Follow Me mainly because the volume and tone of Dave’s voice changes quite significantly. This is something that Tony Maserati also recommends doing so that you can apply different EQ and compression treatment to the different sections and I have personally found it quite beneficial doing so. I did however keep the main vocal on the same track for the rest of the songs as Dave’s voice retains the same tone and level throughout.

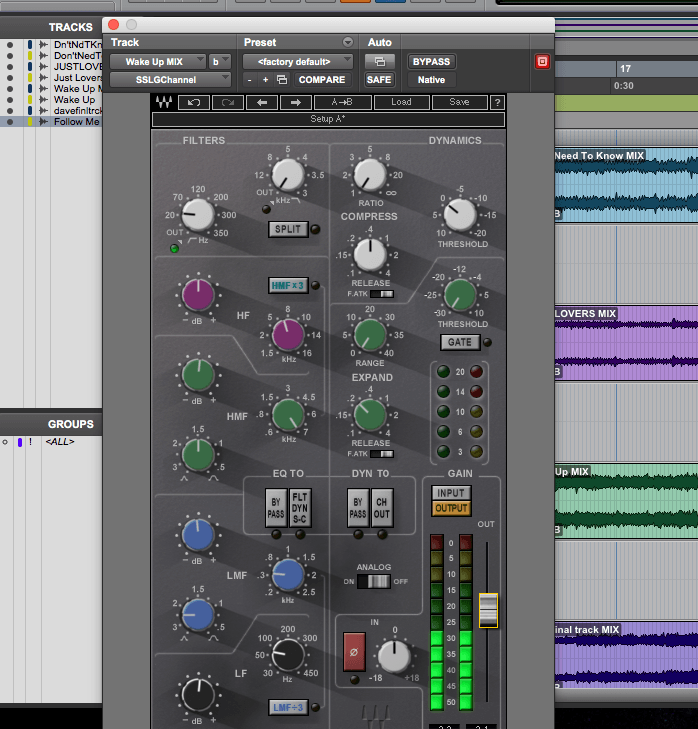
My main tool for vocal processing was the SSL G-Channel, mainly because it has everything I need for processing vocals, it has more of a coloured sound compared to the stock Pro Tools EQ and reduces the overall amount of plugins in my project. It also allows me to apply EQ before compression which is something I want to do based on Chris Lord-Alge’s previous masterclass.

Each vocal was given a HPF to remove everything below around 90hz to prevent the build up of LF and to make space for other instruments that would be occupying that area of the frequency spectrum. Then, using more techniques from Tony Maserati and Jimmy Douglas, I applied some LMF reduction between 200-300hz to remove some of the ‘muddy’ and ‘boxy’ sounds and to increase separation with some of the other instruments, especially the bass and guitars. From this I proceeded to add some top end at around 7-8khz to add some shine and brightness to really help it cut through the mix. I’ve also found that by using the SSL to add top end as oppose to the Pro Tools stock EQ, the vocals sound a lot warmer where as i’ve found that the Pro Tools EQ can make things sound a little fizzy and thin when boosting in this frequency range.

I then decided to add some more compression into the vocal signal path. However I didn’t want to go too over board here as I already applied compression in the tracking stage and applying too much would make it sound squashed and lifeless. All I did was use the compressor on the SSL G-Channel by setting it to a fast attack time in an attempt to catch some of the loud transients that the hardware compressor may have missed in the tracking stage. Any further volume changes that I wanted to make I made using subtle automation. Using this analogue modelled compressor also helped give the vocal more character and is similar to how Chris Lord-Alge uses the CLA-76, Jimm Douglas and the UA 1176 and Tony Maserati with the GML 8200. Before moving on to the next step, I also used a de-esser just to remove some of the harsh sibilance.

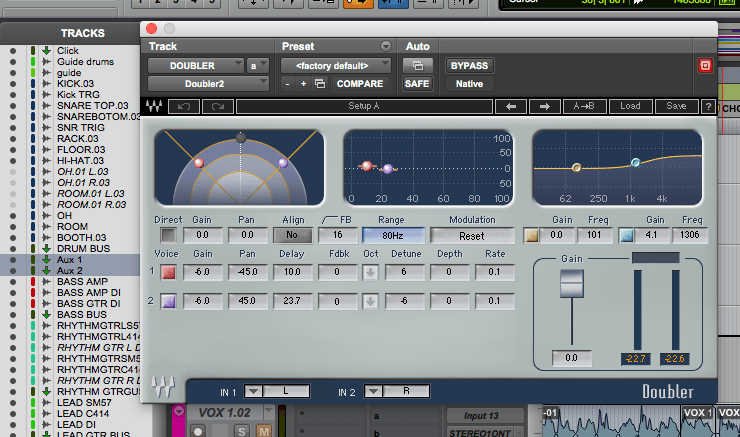
The next technique I wanted to implement into my work was something I had never really tried before but always wanted to. This technique was to use a form of doubler/harmoniser as an effect to add space and wideness to the vocals. There are many plugins on the market that do this to some extend however I was lucky enough to pick up the Waves Doubler at a very low price during a sale. By sending the vocals to the doubler via an aux input, it allowed me to mix in doubled versions of the track where I could alter the width, delay, pitch and the amount of modulation on the pitch. A similar technique is also used by Tom Lord-Alge who uses the stereo spreader in the SPL 9739 to create width in the vocal track. below is a picture of the basic setting I used on the doubler.

Screen Shot 2017-12-15 at 13.53.04

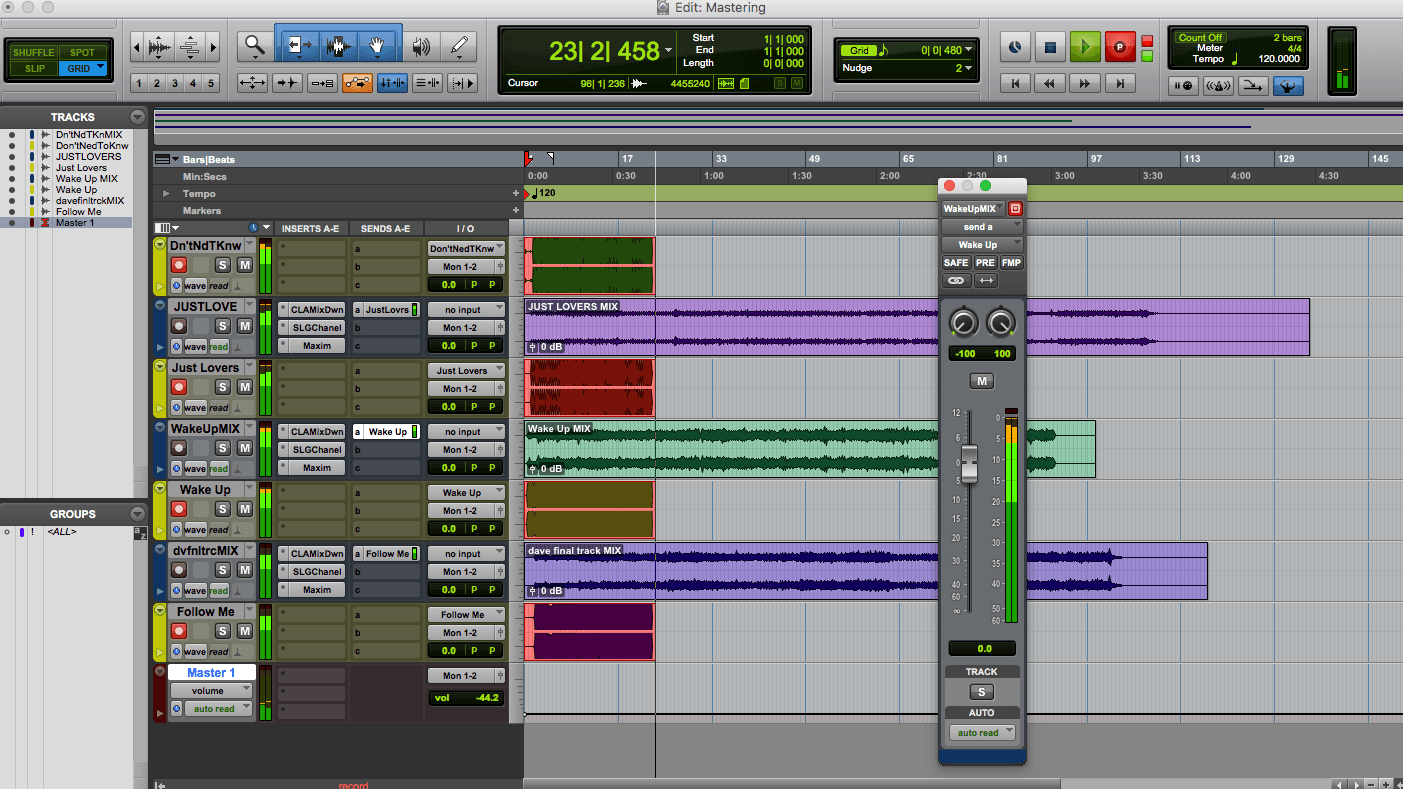
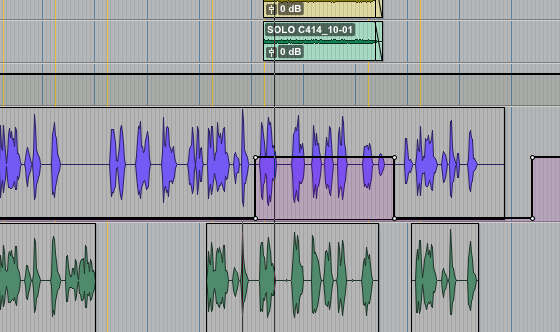
After looking at how Andrew Scheps uses doublers, I actually altered the rate and depth of the pitch modulation so that it didn’t remain on the same pitch all the time. Doing so added even more character to the vocals, especially during the bigger parts of the songs like the chorus’s and bridges. I did still use it on the quieter parts of the songs however not the same extent which I altered throughout the songs by automating the aux send level as you can see below.

Screen Shot 2017-12-15 at 13.52.46

The final step for the vocal processing was to add delay and reverb to create ambience and more space. I had seen a lot of producers/mixing praising the H-Delay from Waves including Andrew Scheps and Mark Ronson and was able to pick it up on sale at the same time as the doubler. The H-Delay provided a very versatile amount of delay options which I could easily use in my project, plus the in built HPF and LPFs allowed me to use it without the need to add addition EQ to the aux track. I used the delay subtly and automated it throughout the songs to give certain sections and lines more character and variance. I also applied the same automation technique to the reverb send and even went as far automating the reverb time for different sections of the songs as you can see below.
A lot of the reverb used on the vocal track was the Sound Toys Tiny Plate. This mainly because I managed to pick it up for free on a deal and it included a low cut filter which, similar to the H-Delay, allowed me too roll off some of the low end to avoid a load of low end from running into my mix.

Screen Shot 2017-12-15 at 14.13.32

I have found that by implementing these techniques, especially the use of the doubler and analogue compression, I have produced and mixed some of the best vocals tracks I have worked on to date. Using the doubler has really helped bring life and width to the vocals and automating it through out the songs has made the songs sound a lot more interesting and exciting. When benchmarking them against Bonfire by The Hunna, I found that width and clarity was easily on par with their vocal production, especially when in terms of width and stereo spread.

In the Studio with Mark Ronson
https://www.waves.com/in-the-studio-mark-ronson?utm_source=wnletter&utm_medium=email&utm_content=studio-mark-watch-now&utm_campaign=weekend-newsletter-oct-13-2017-ronson-ms

Mixing Justin Timberlake Vocals – Jimmy Douglas
https://youtu.be/PpIanhvC9qw

Mixing James Blunt Vocals – Tony Maserati
https://youtu.be/SheIgGbB-5s

Spreading Vocals – Tom Lord-Alge
https://youtu.be/1QbtRkzfagU

Vocal Chain & FX – Andrew Scheps
https://youtu.be/zdxykjBFCv4

Tutorial – Week 12

This was my last tutorial with Ben and since last week I had struggled to get much work done due to the fact that I had been very busy in New York. This was quite a short tutorial as Ben knew that my time would be better spent working on my project. Apart from finishing the tracks, we did write down a list of important things that needed to be included when finishing off my blog. These were as follows:

  • A synopsis for my project.
  • My reflective summary.
  • Ensure that I had blog posts relating to each learning outcomes
  • To benchmark my work explaining how and why I had done stuff as well as comparing and contrasting.

To finish off the session, Ben listened to one of the tracks I had roughly mixed the night before and recommended that I apply the same formula to the rest of them to help maintain consistency between the tracks.

Tutorial – Week 11

Since last week, i’ve published as many blog posts as I had time to even if they still need checking for spelling and grammar mistakes. This meant Ben could see where I was at with them and the areas that I needed to improve on. Overall, he was pleased with the progress I was making with the blog however reminded me of the fact that it could probably benefit with a bit more benchmarking which would help me achieve a higher mark.

With the deadline getting closer, he also recommended that I try and make as much progress as possible with the blog between now and next week. However, this would be difficult as I was going away to New York for a few days before my next tutorial.

I also raised the issue that I was struggling to find time to get into the multi-track studio to do analogue parallel drum compression. He understood that the studio was hard to access this time of year and he suggested that it might be a good idea to see if I knew anyone who I could borrow some hardware from, look at the possibility of doing some processing down at The Sweet Factory in Louth or at push, even see if there were some small studios in Manhattan that would be willing to help me out.