Mastering

Now that Dave is happy with all of the mixes I have sent him, I can now begin the mastering process so that he can release them for public consumption. It was important that I got the mixes to sound as best as possible as I wouldn’t be able to alter the levels during the mastering process. The aim of this mastering session is to improve the overall sound of the songs by making dynamic and tonal changes so that they sound like they should all fit together.

Before I began mastering, I mixed the tracks to way so that the overall levels weren’t too high or too low and I did this by keeping them between -15 and -10, utilising the research presented by James Wiltshire in the K-Metering video. This way I had enough headroom to apply EQ, compression and limiting. I based a lot of my mastering techniques on Warren Huart from Produce Like A Pro as he takes a very DIY approach, which is similar to what i’m doing, but also from Jonathan Wyner from iZotope and Graham from The Recording Revolution.

Once I had loaded the stereo mixes into a new protools session, I began by applying compression to the tracks using the compressor on the CLA mixdown. My aim was to achieve around 2-3 dbs of gain reduction to control some of the sharp transients and to help the song glue together more efficiently. However, I was careful not to over compress the tracks to avoid some of the issues surrounding the loudness war which I referenced in an earlier blog post. I also compressed them in such a way that the tracks all had a similar dynamic range and were all consistent with one another.

Screen Shot 2017-12-15 at 14.40.15

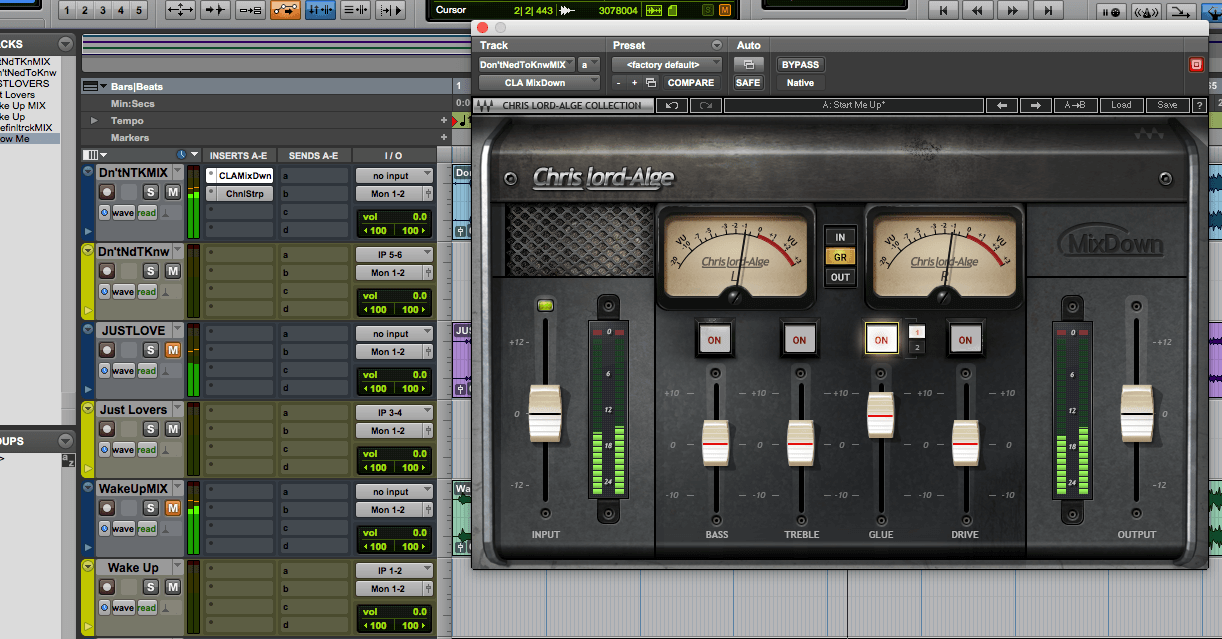
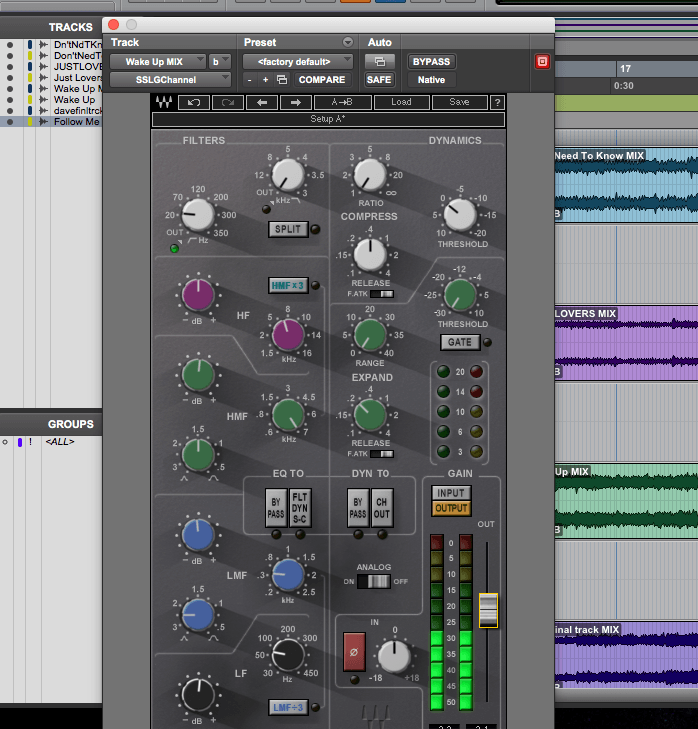
The next step was to improve and alter the tonal characteristics of the tracks so that they were all coherent with one another. I used Warren Huarts Home Mastering Tips as a template by doing the following:

  • Cutting out super lows at 20hz by using a HPF.
  • Boosting the kick drum at 60hz by 0.4db.
  • Cutting 350hz by 0.2db as it can cause problems and take up room due to the build up from the bass and low end of the guitars.
  • 1db boost at 7khz to add a little more presence.

This was a good starting point however i then altered these slightly on each song so they were more coherent with one another whilst being close to the reference tracks.

Screen Shot 2017-12-15 at 14.53.22

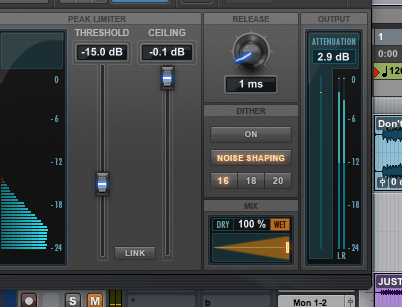
When I was happy with the tonal changes I had made, i then used a limiter on the tracks so that they could be delivered to Dave at the appropriate volume. Using the stock limiter in Pro Tools, I set the ceiling to -0.1 dB  (some CD players distort if its set to 0) and then set the threshold accordingly to each track so there was no major volume jump or dip between them. The aim here was to try and achieve around 2-3 dB of gain reduction. This is so that they were loud enough to compete with their competitors however, they weren’t being push so hard that they lost their dynamic range and began to sound squashed.

Screen Shot 2017-12-15 at 14.46.39

Screen Shot 2017-12-15 at 15.00.22

It’s also important to note that although I made the tonal and dynamic alterations to make them coherent with one another, they were also altered in a way so that they sounded similar to their reference tracks. For example, Just Lovers was referenced alongside ‘Chocolate’ by The 1975 and ‘Follow Me’ was referenced alongside ‘Bonfire’ by The Hunna.

Using this method as template for my mastering session has helped all of the tracks glue together and sound like a really coherent release. I have employed similar techniques in my other work however they have not been to the same extent as the ones I have applied here. I have been guilty of just trying to make them as loud as possible with taking enough consideration about their dynamic range and EQ.

When listening to them alongside my Spotify reference playlist, I actually found that they were louder when the volume in the Spotify player turned up to full. This is great for for making them stand up to their competitors however it might just be because the tracks in Spotify are a Ogg Vorbis format and my tracks are 16bit Wavs.


Mixing vs Mastering – What’s The Difference?
https://youtu.be/DekX3nq5fNE
 Graham from the Recording Revolution

iZotope – What is Mastering?
https://youtu.be/022zPbJoKbo
 Jonathan Wyner

The Loudness War

When planning ahead for the mastering part of my project, this video shows that I need to retain a good dynamic range within my audio to help it stay clear and natural.

Grant Leung suggests that years ago albums were produced with a lower dynamic range so they remained clear and easier on the ear. However, years later with the addition of record companies wanting to make of an impact in the industry, they are being produced to be as loud as possible in an attempt to rival the competition. This is resulting in music to lose it’s natural dynamic range and tonal qualities just so it can bumped up as close to zero as possible. The information presented here is also similar to the video by James Wiltshire when he talks about K-Meter and is something I am also guilty of in my previous work.

Grant also suggests that the ‘loudness war’ reached a pinnacle in 2008 with the release of Death Magnetic by Metallica with it being clocked as the loudest album ever. However, it received a back lash from fans due to its poor sound quality and low dynamic range making the whole issue around the loudness war pointless.

When implementing this onto my project, it is clear that during the mix stage I need to ensure the tracks have enough natural dynamic range, are all at a good level and then when it comes to mastering, make them loud enough so they stand up to their competitors without over compressing and making them lose their dynamic range.


K-Meter Mixing Tips & Monitor Calibration – With James Wiltshire

Although i’m still in the tracking/production stage of my project, I wanted to start looking at some research to help give me a better understanding of how to prepare for the mastering stage. Ben Selway actually pointed this video out to me and it provides some great information with regards to headroom, input and output levels, gain structure and how to get the best out of your plugins, especially the analogue modelled ones.

James Wiltshire suggests that these days a lot of producers and mixers seem to think that the best way to mix a record is to make it as loud as possible and get to 0 on the digital full scale as quickly as possible. However, this can cause mixes to sound cluttered very quickly and can prevent them from sounding clear and solid, mainly because the plugins aren’t working to their maximum potential and there is a risk of digital clipping. For example, James tested out the Waves plugins and found that they work best at -20. The analogue modelled plugins will also run similar to this as their hardware predecessors will have required the correct amount of input volume for them to function correctly.

With K-Meter, it allows you to work towards a temporary 0 at either K-20, K-14 or K-12. Working to these levels will prevent you from running your plugins far too hot, prevent premature digital clipping and provide you with a good end level which can then be turned up as much as you’d like during the mastering process, especially if you are mastering yourself. If you are using a mastering engineer for your tracks it also allows you to send them a good level which they can comfortably worth with.

As I will be mastering the project myself, this is vital piece of information to understand so that I can master all of the final mixes as efficiently as possible.


Aims, Objectives and Learning Outcomes

For my project I will be working with David Farnan (aka DB Jones) to produce a 4-track solo EP which will involve a full band sound. Stylistically it will have elements of indie, indie rock and pop genres, require me to source an appropriate session drummer and to produce it in such a way that it stands up to and stays relevant with my reference playlist.


Aim:

To work with a client to produce, engineer, mix and master 4 tracks of an EP which they can then readily release onto multiple music platforms.

Objectives:

1. To source a client and make contact with them to discuss what direction they want to take with the EP.
2. Work on pre-production with the client so we both have a clearer understanding of what we want to achieve in the recording sessions to ensure an effective workflow throughout the project.
3. Source the appropriate session drummer and work with them and the client to book all of the required recording sessions.
4. Record all of the required parts for the EP using the different outboard techniques and approaches that i have researched whilst making sure the client is happy with with what has been captured.
5. Edit and prepare all of the recorded tracks and then begin the mixing process whilst specifically focusing on the use of outboard processing and different vocal techniques.
6. Ensure the client is happy with the mixes and then, using the research i’ve gathered, master the EP so it can be distributed to the required platforms.


Learning Outcomes

1. To improve my knowledge and understanding of outboard hardware, specifically eq and compression, by researching the workings of the hardware itself, establishing how other producers use hardware and utilising it in my own work for recording and mixing.

2. To improve the way in which I tackle the workflow of the project by ensuring constant contact and communication with the client, improving time keeping and by looking at how other producers create an effective workflow.

3. To improve the sonic aspects of my vocal production by using different recording and mixing techniques that are inside and outside of the box, and then applying the appropriate ones to my work.

4. Have a clearer understanding of the mastering process by looking at the technical aspects of mastering and what it consists of, having an insight into how other producers master their work and benchmarking this project with my previous work to ultimately master this project to a higher standard than before.